Ipad/Iphone Devices
How to for adding epbfi.com email addresses to iOS devices
Add New Account
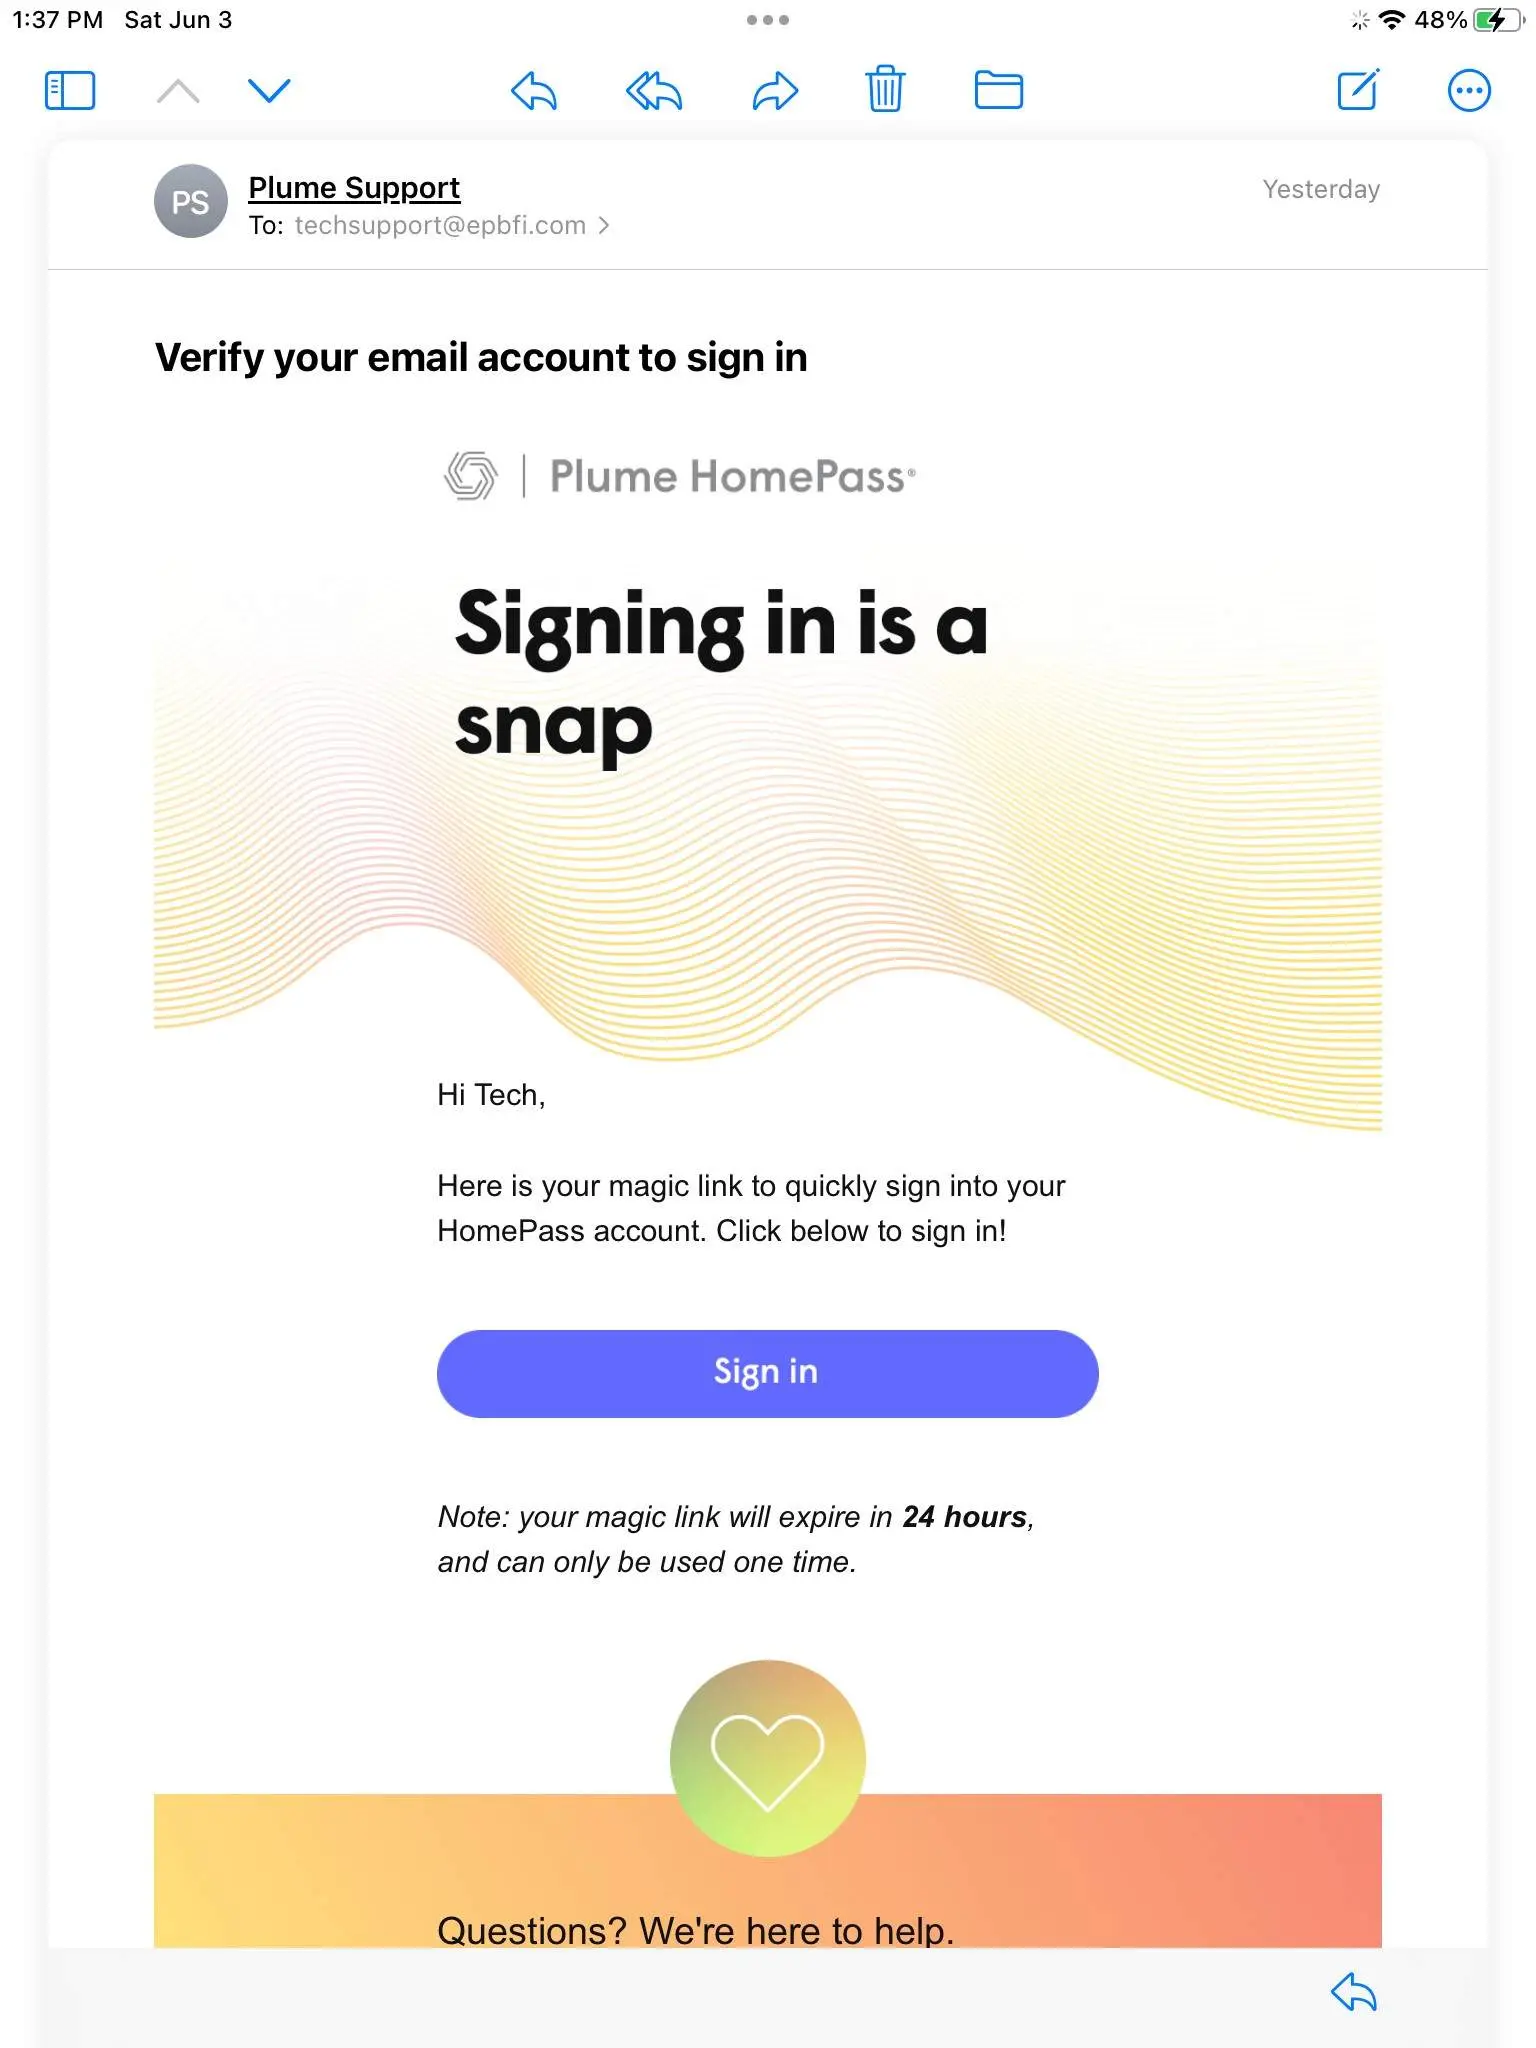
Startup
The program starts up looking like this.
You don't need to be here though. None of the settings are changed here.
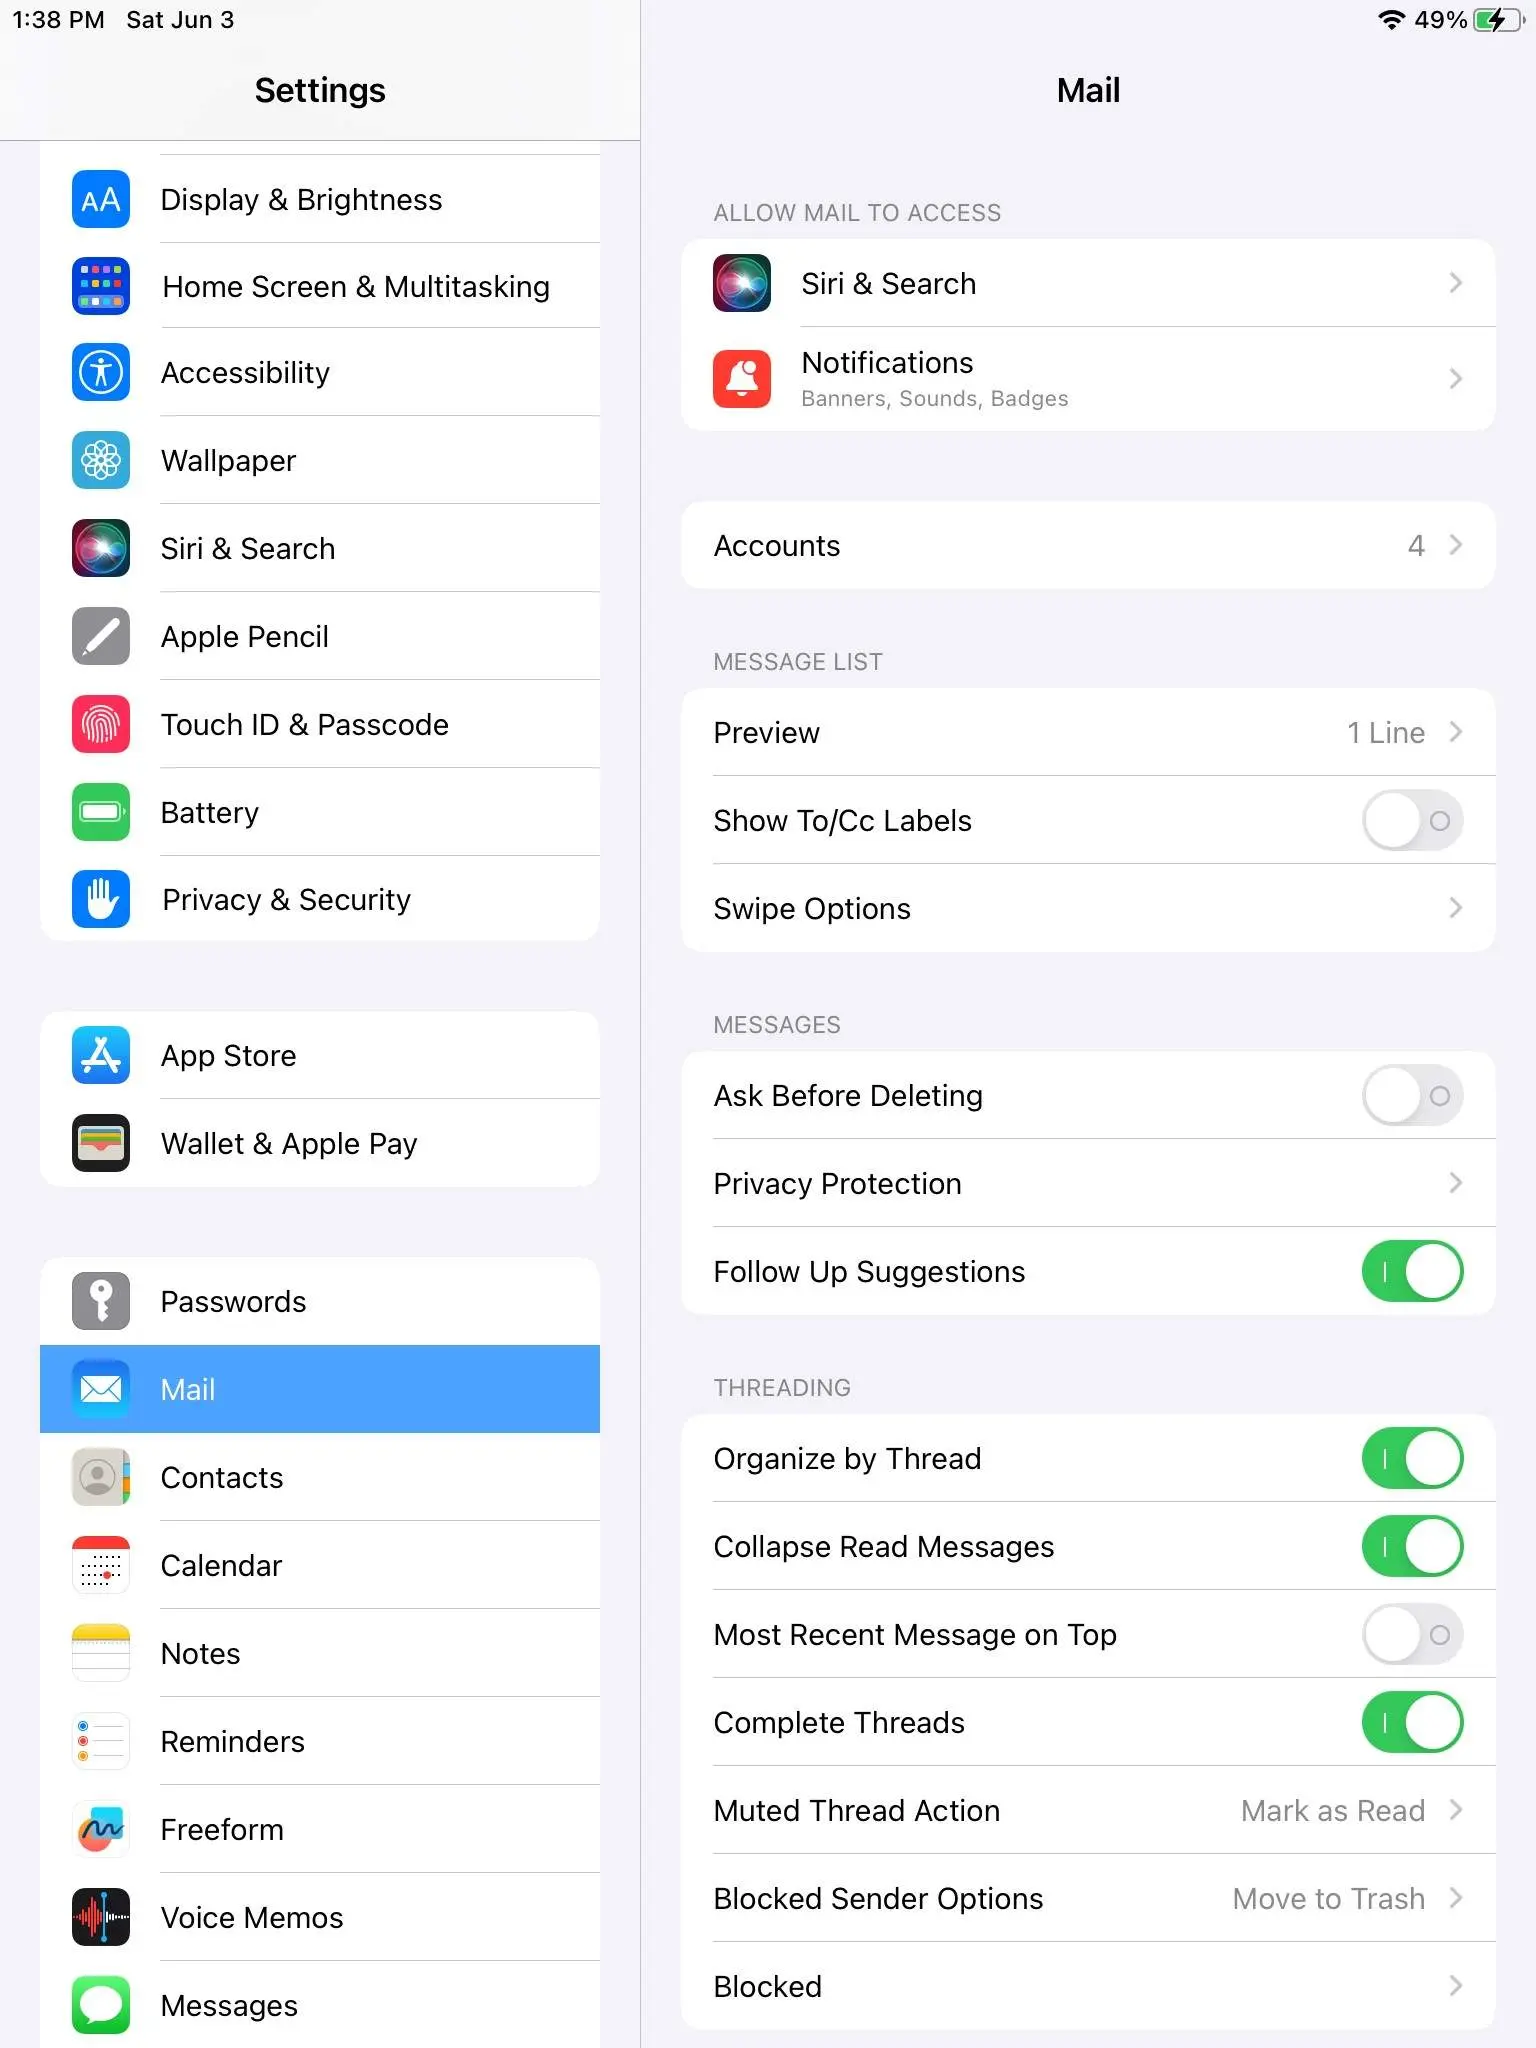
Go to Iphone/Ipad Settings, then Mail, then Accounts.![]
- From the Iphone/Ipad home screen go to the system settings.
- Click on Mail. (on an ipad this on the left, on an iphone you will scroll down)
- Click Accounts.
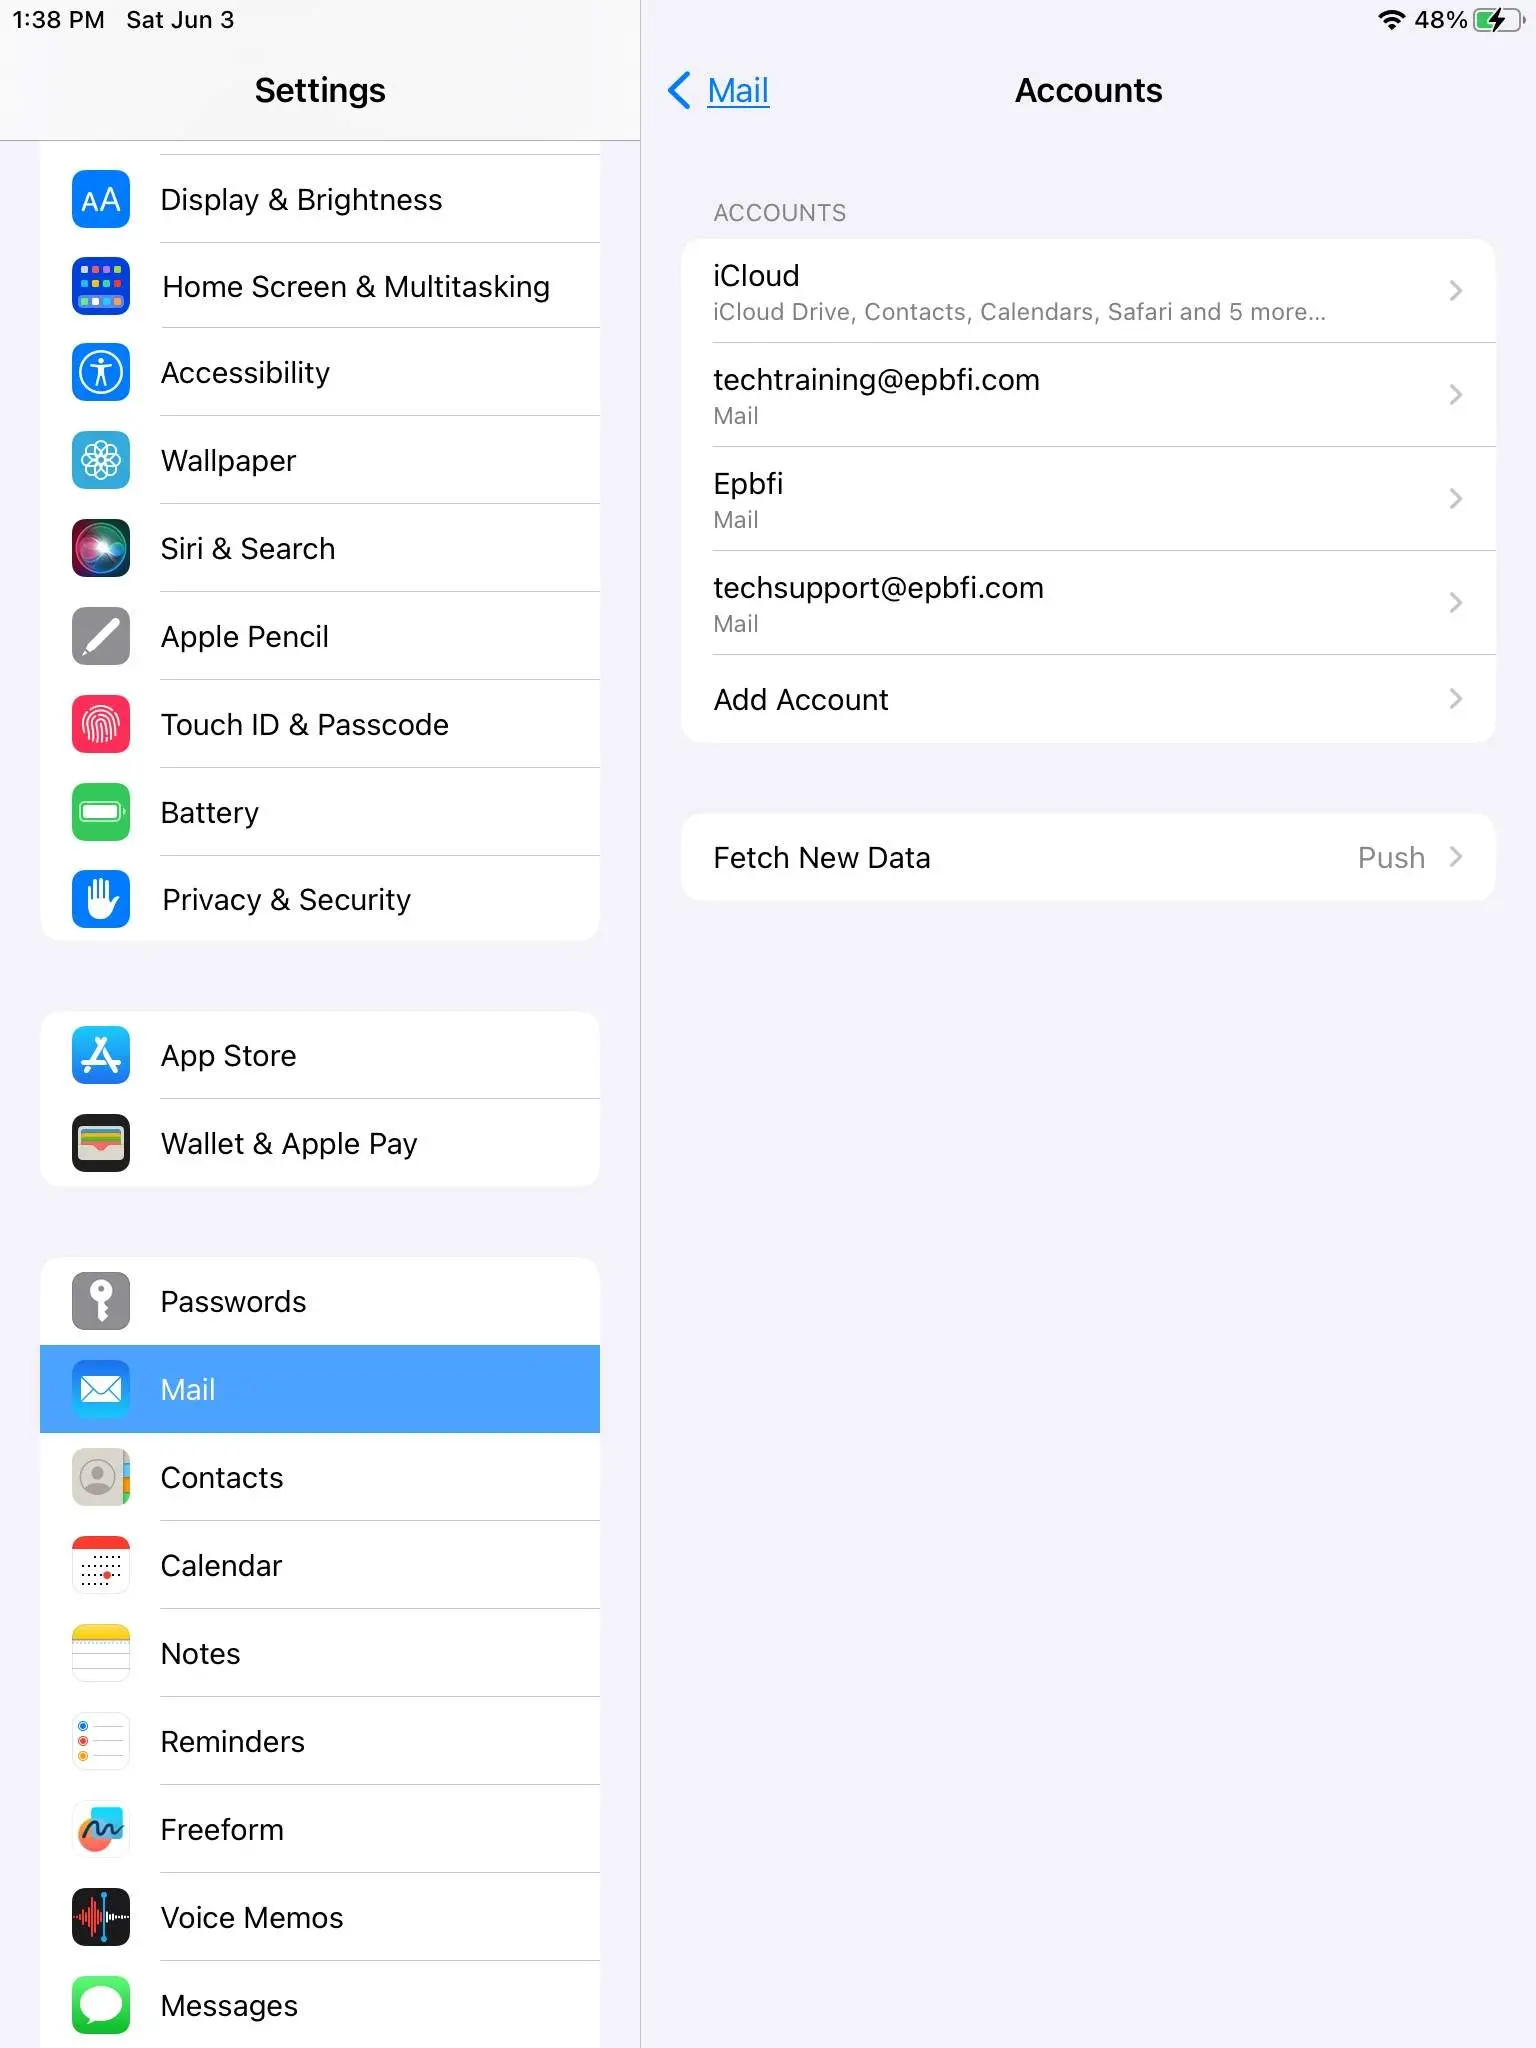
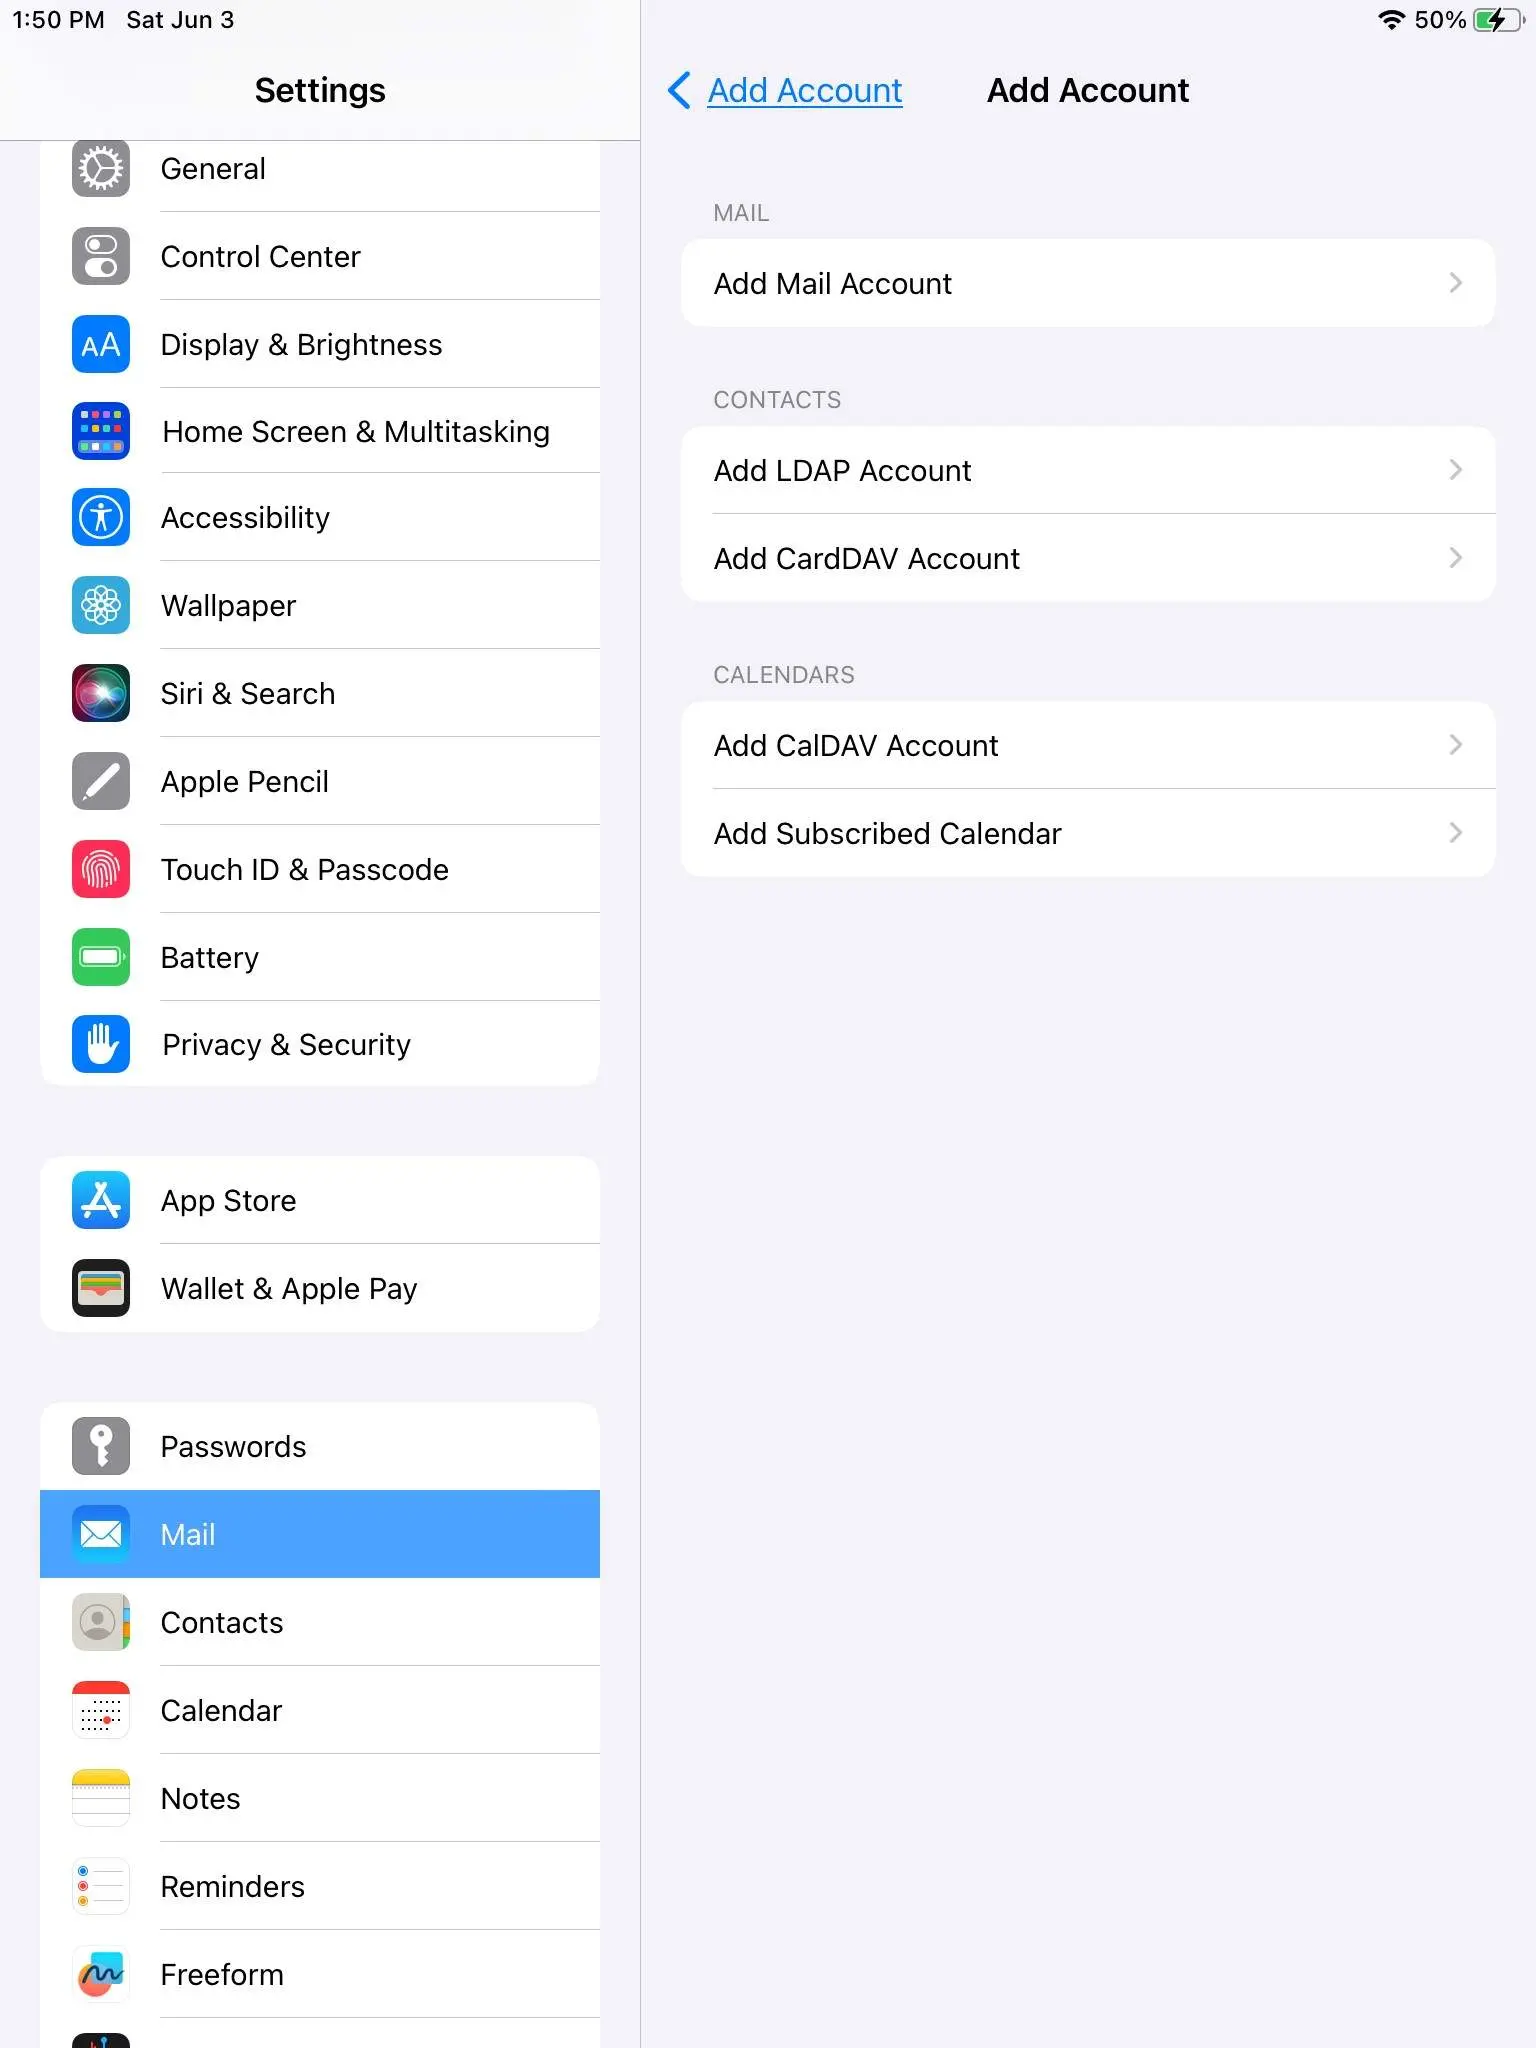
Click on Add Account at the end of the list of accounts.
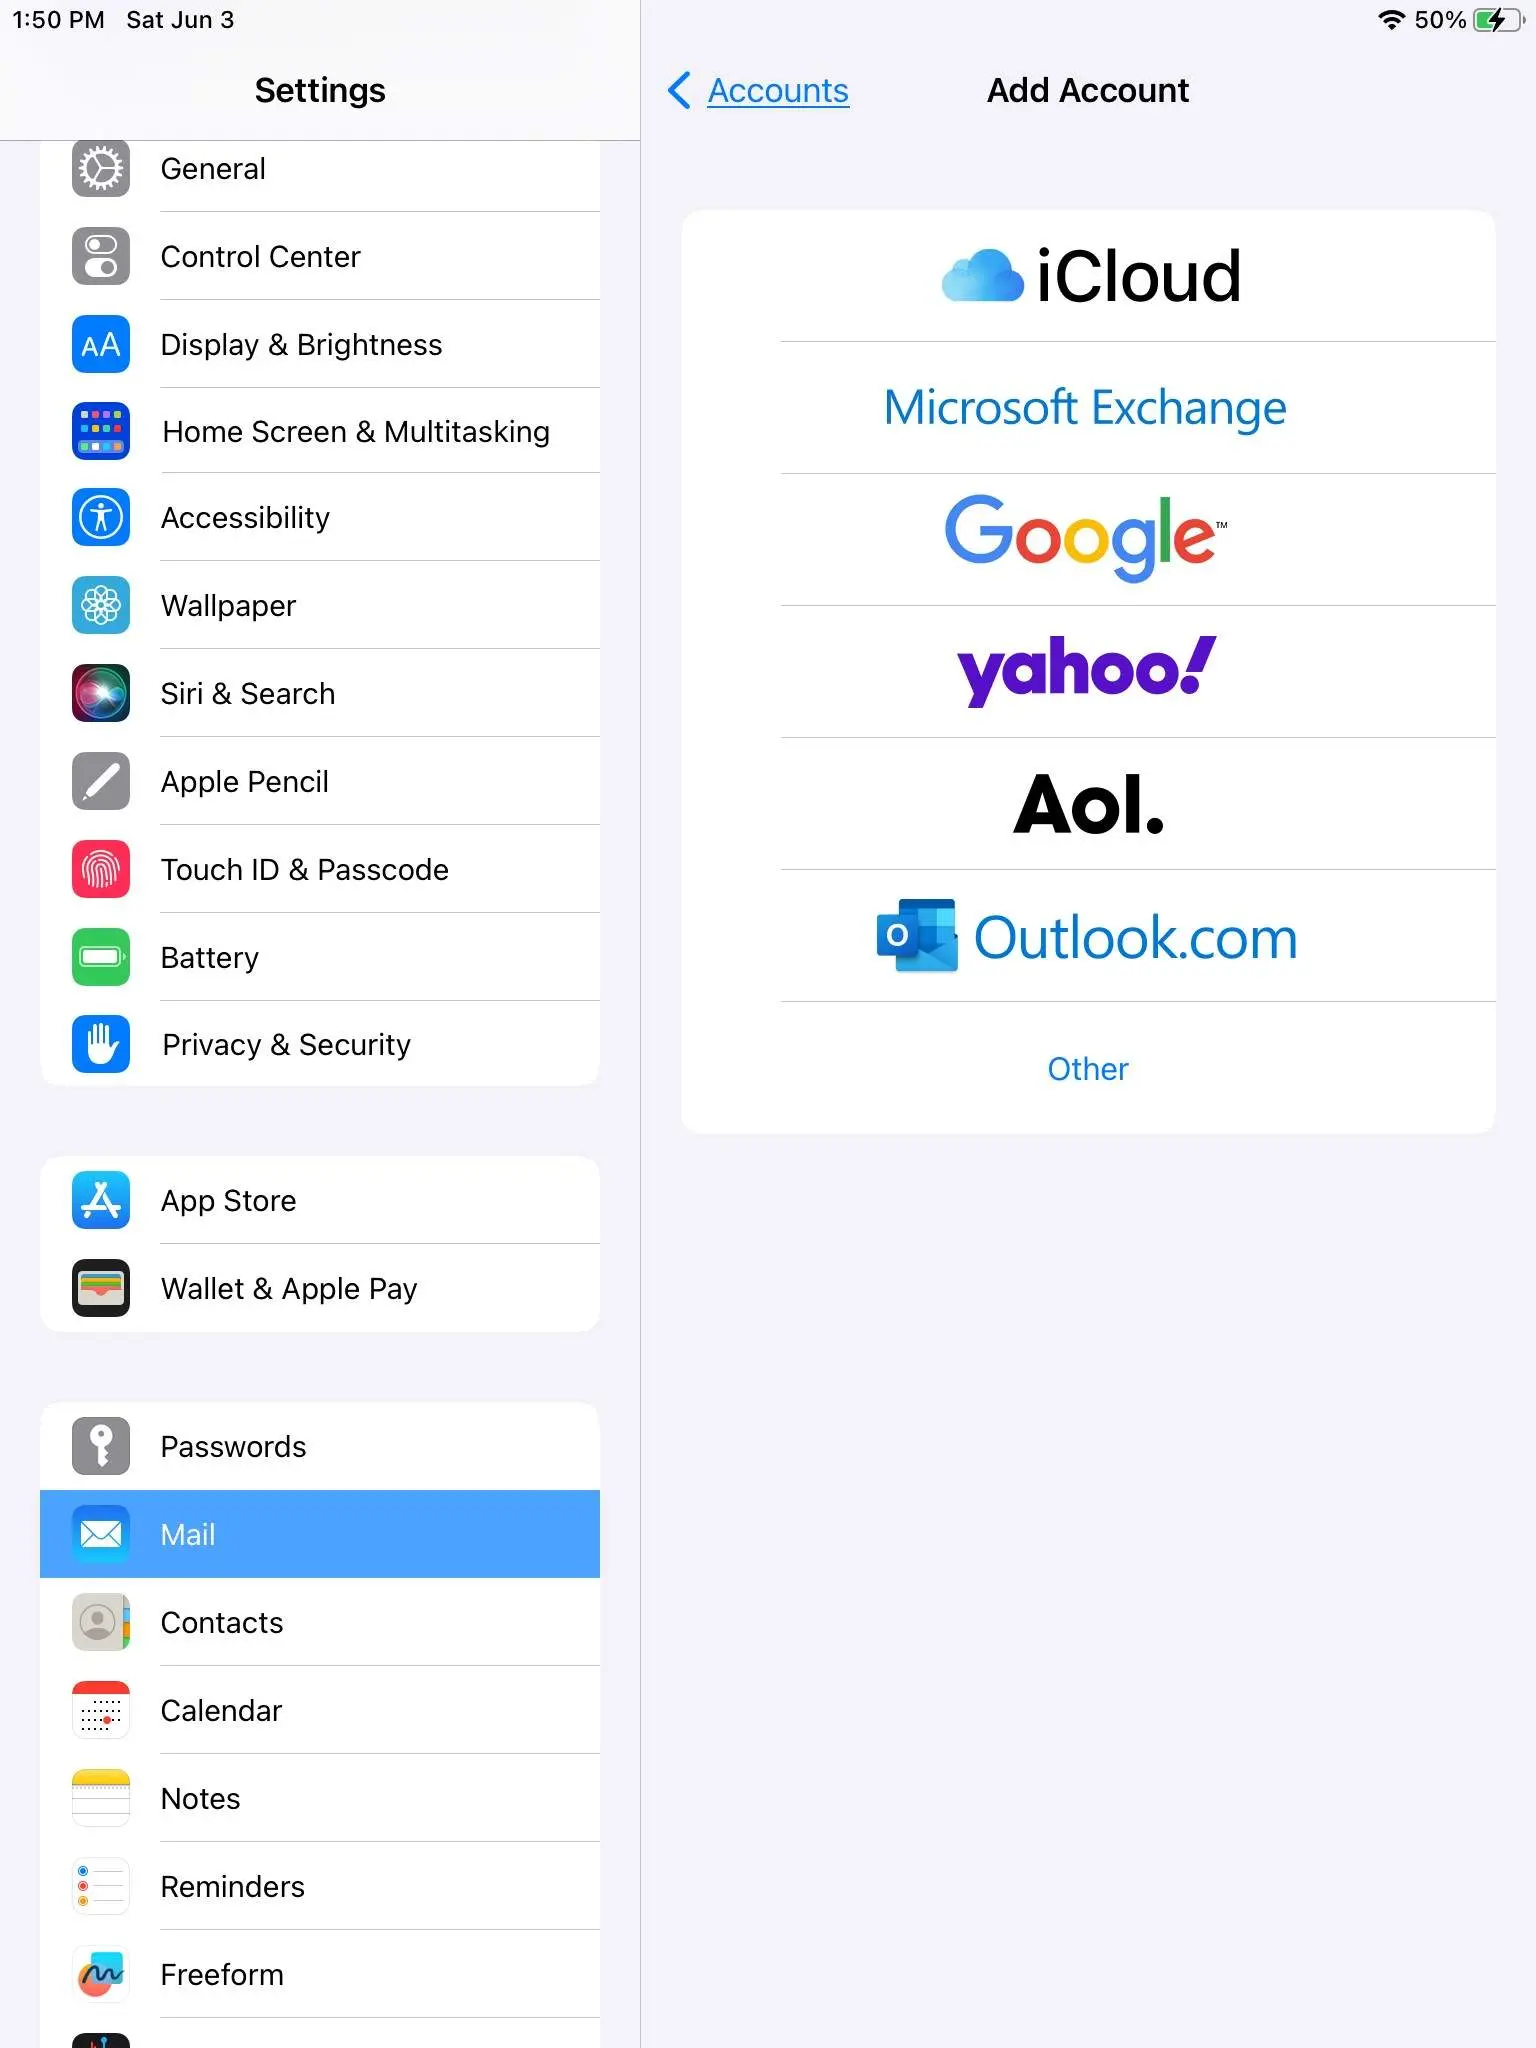
At the end of the list of providers, click on Other.
Click on Add Mail Account
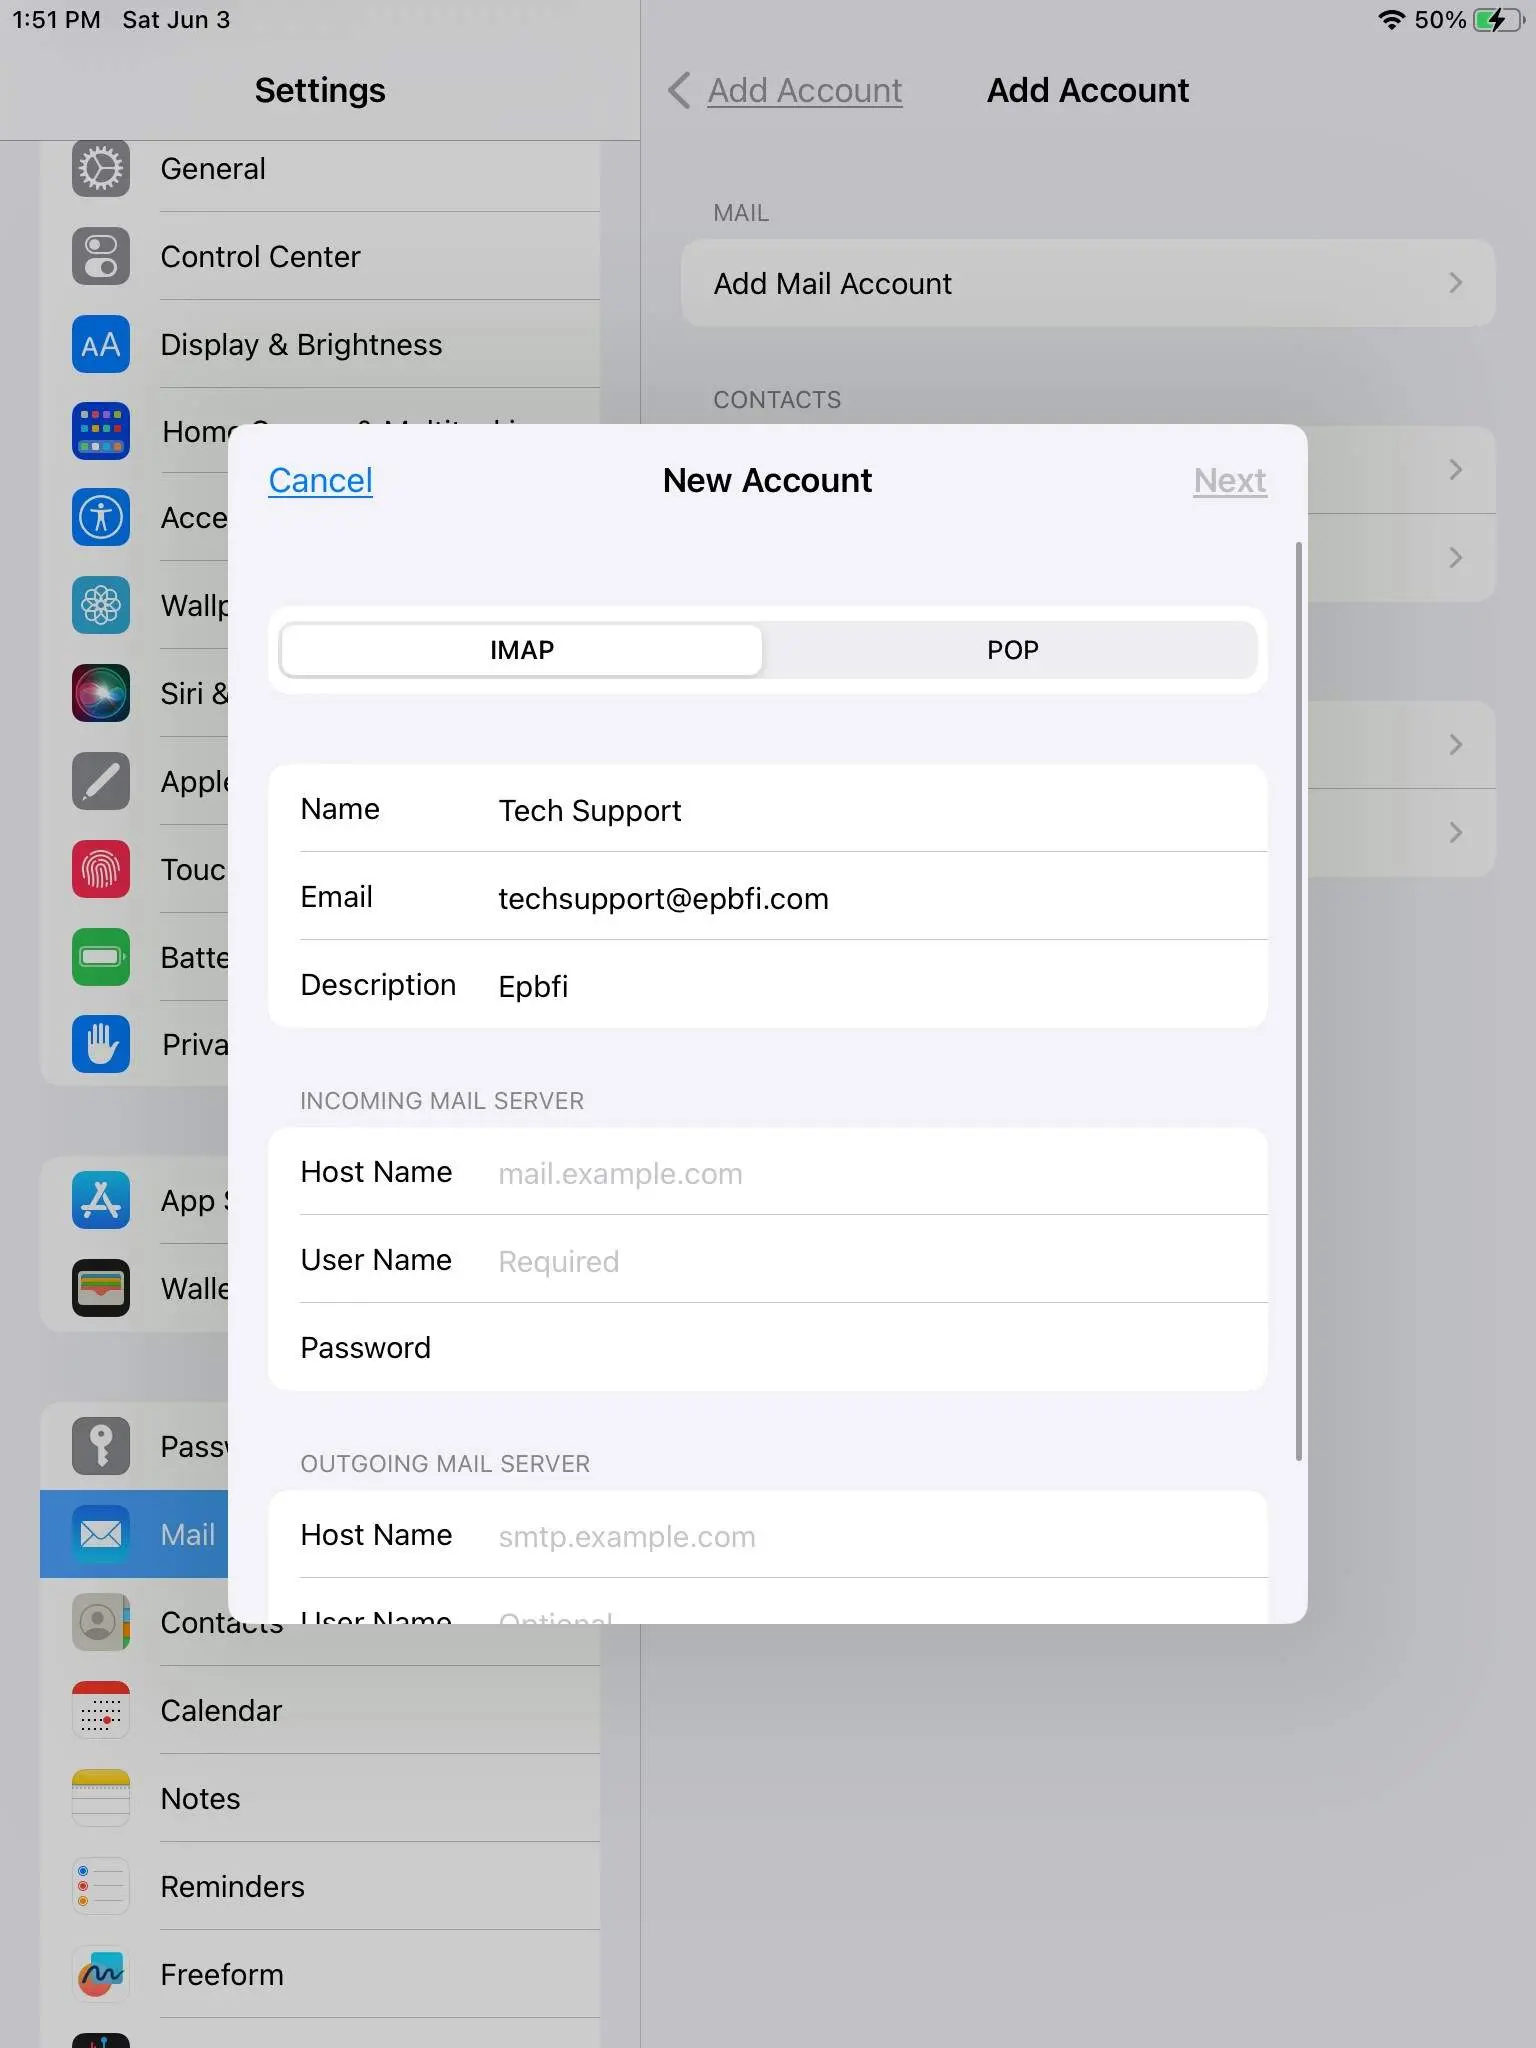
Fill in Basic Info
- Name is what people see when they get an email from you instead of just your email address.
- Enter the email address.
- Enter the password.
- Optional Description is how the email shows up in the inbox list.
- Click Next in the top right.

Fill in Basic Server Info
- Name is what people see when they get an email from you instead of just your email address.
- Enter the email address.
- Optional Description is how the email shows up in the inbox list.
- Enter the incoming server hostname.
- Enter the username. Full email
- Enter the password.
- Scroll down and enter the outgoing server hostname.
- Required Enter the username. Full email
- Required Enter the password.
- Click Next in the top right.
Verification
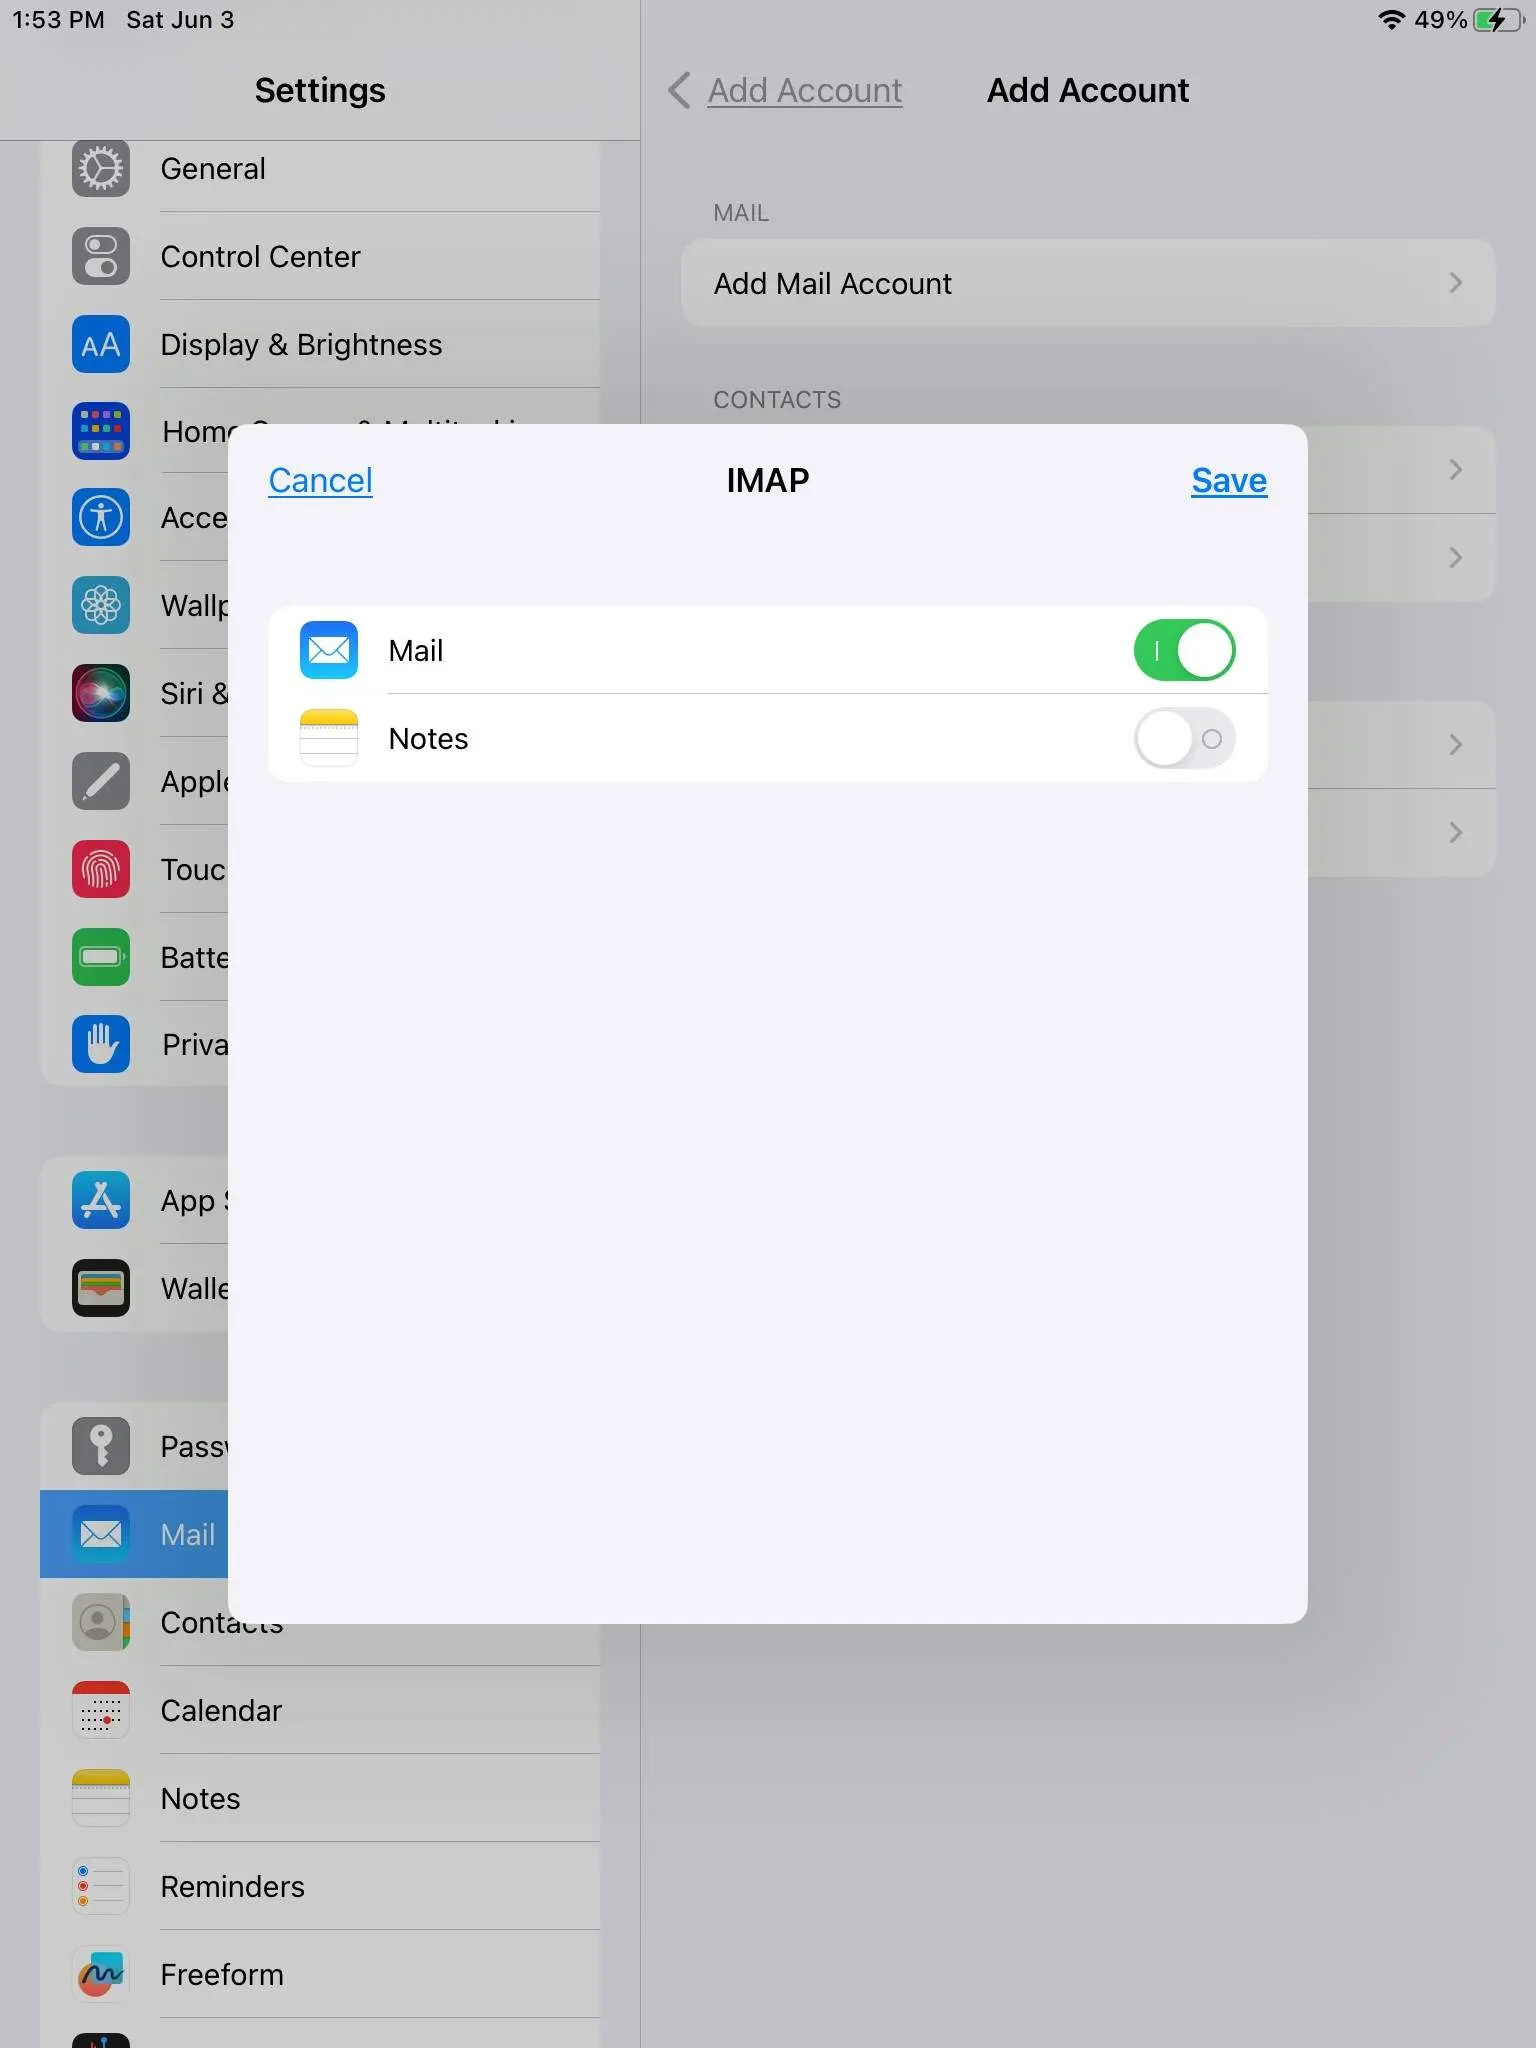
- If verification succeeds, all you have to do is turn on the mail account and click Save.
- If you get a message about unable to use SSL they probably entered their info wrong.
Re-enter the info and if it fails a second time, save it anyway, enable mail, and keep going with the following steps.
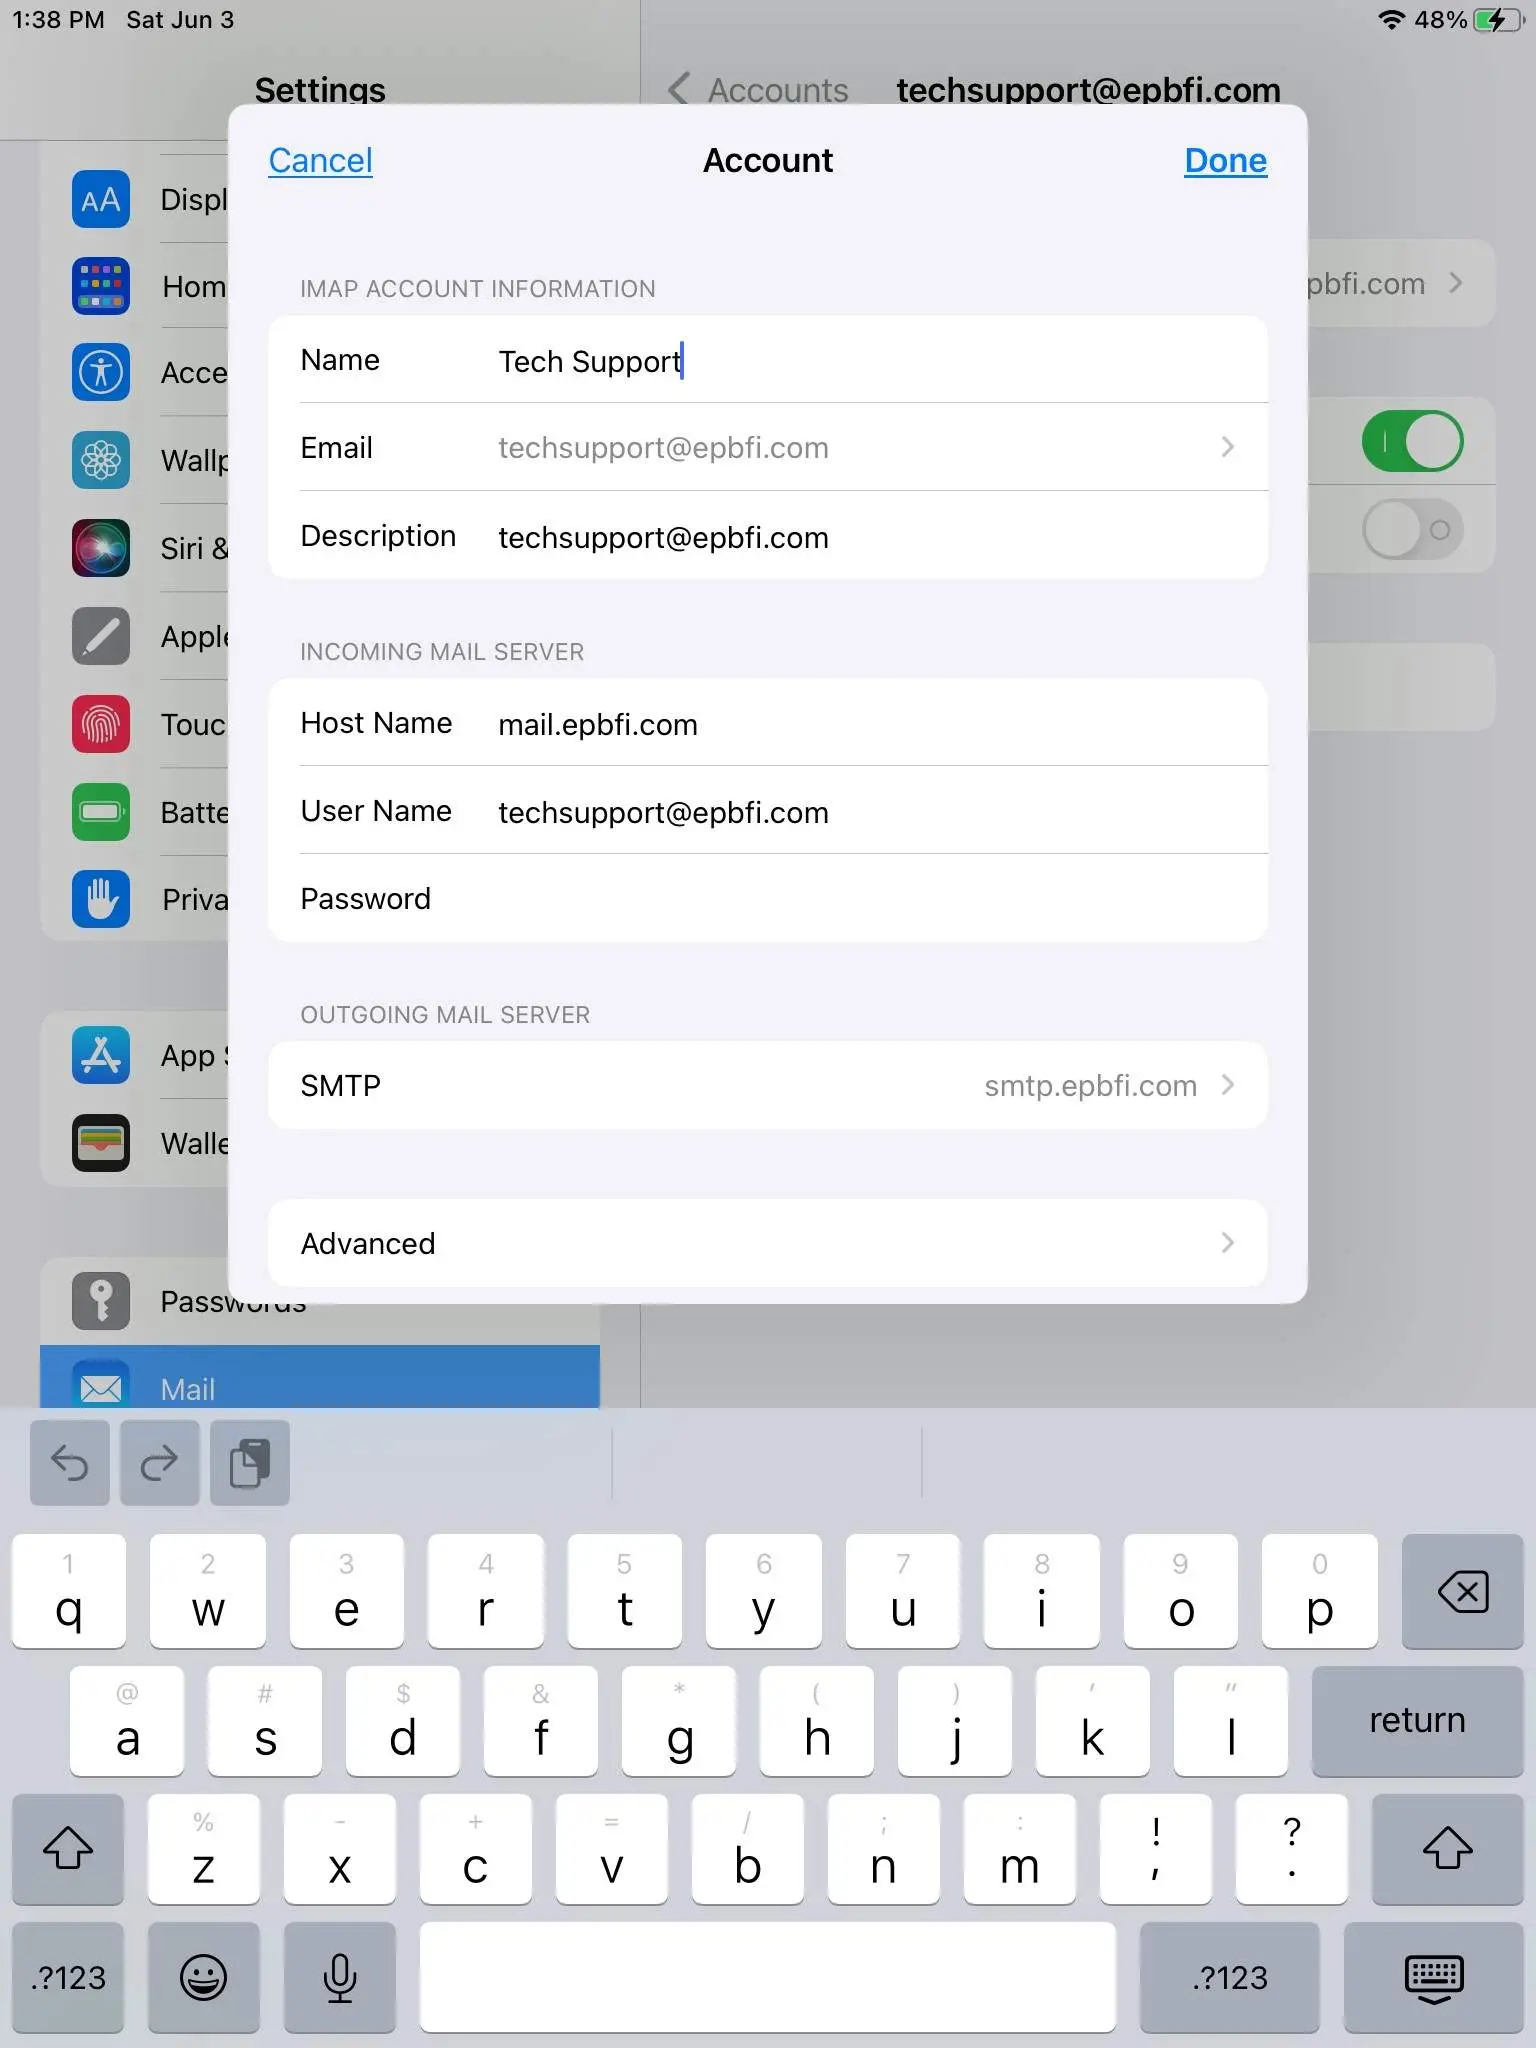
Click on the account
Located on the right (should show with Epbfi or the description they entered).
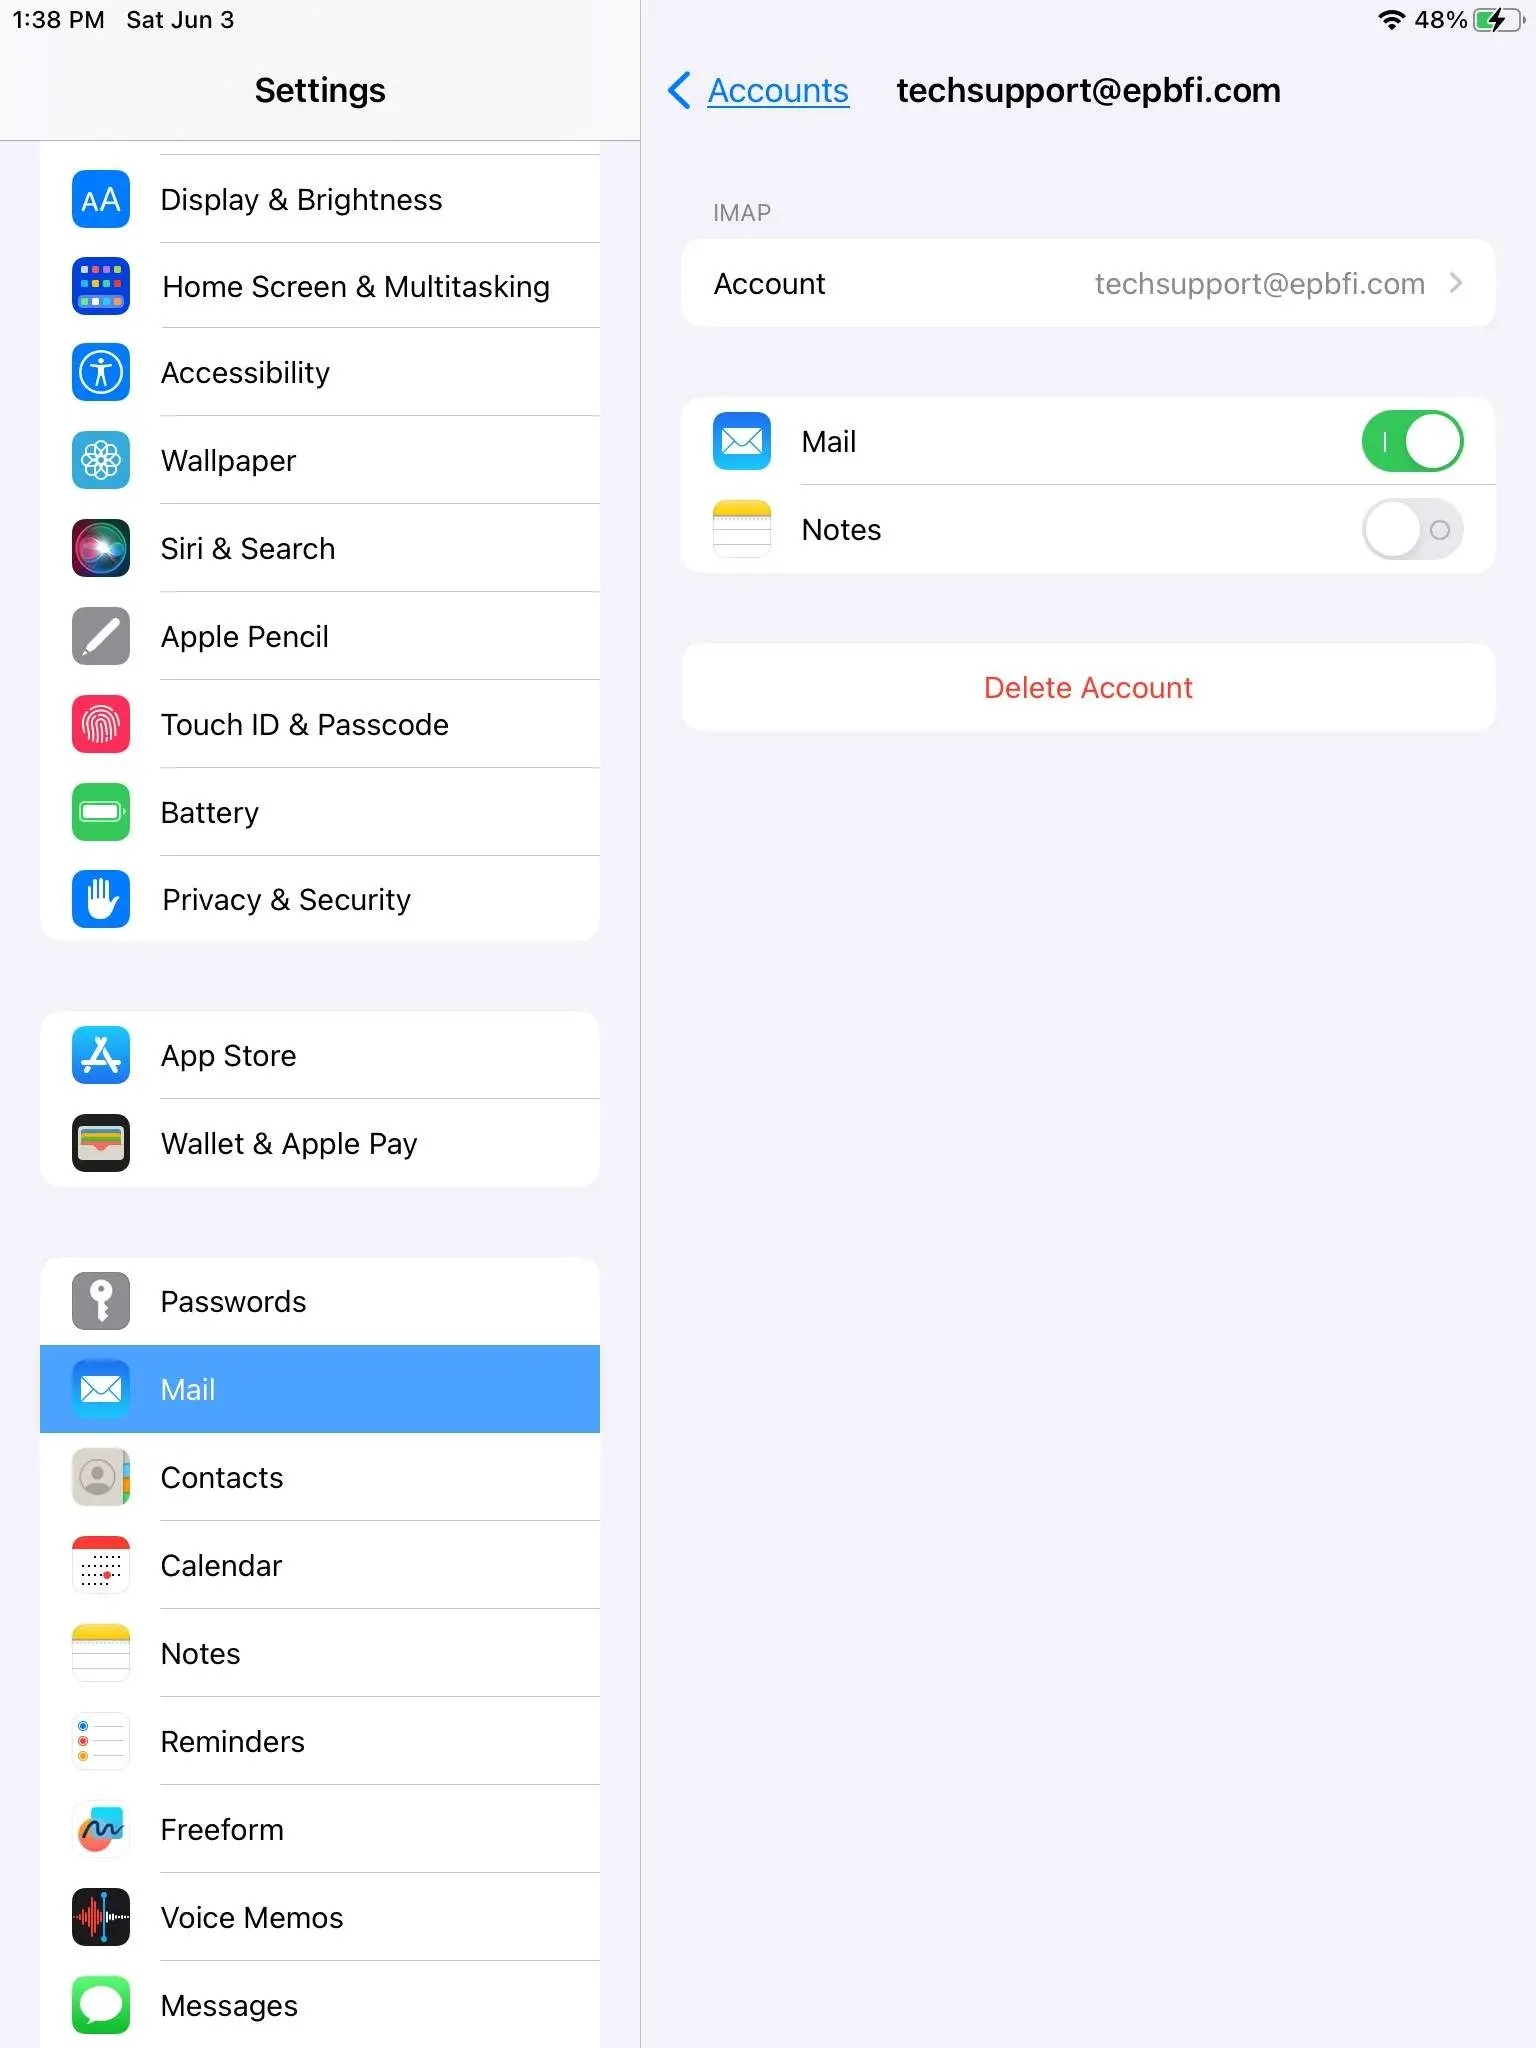
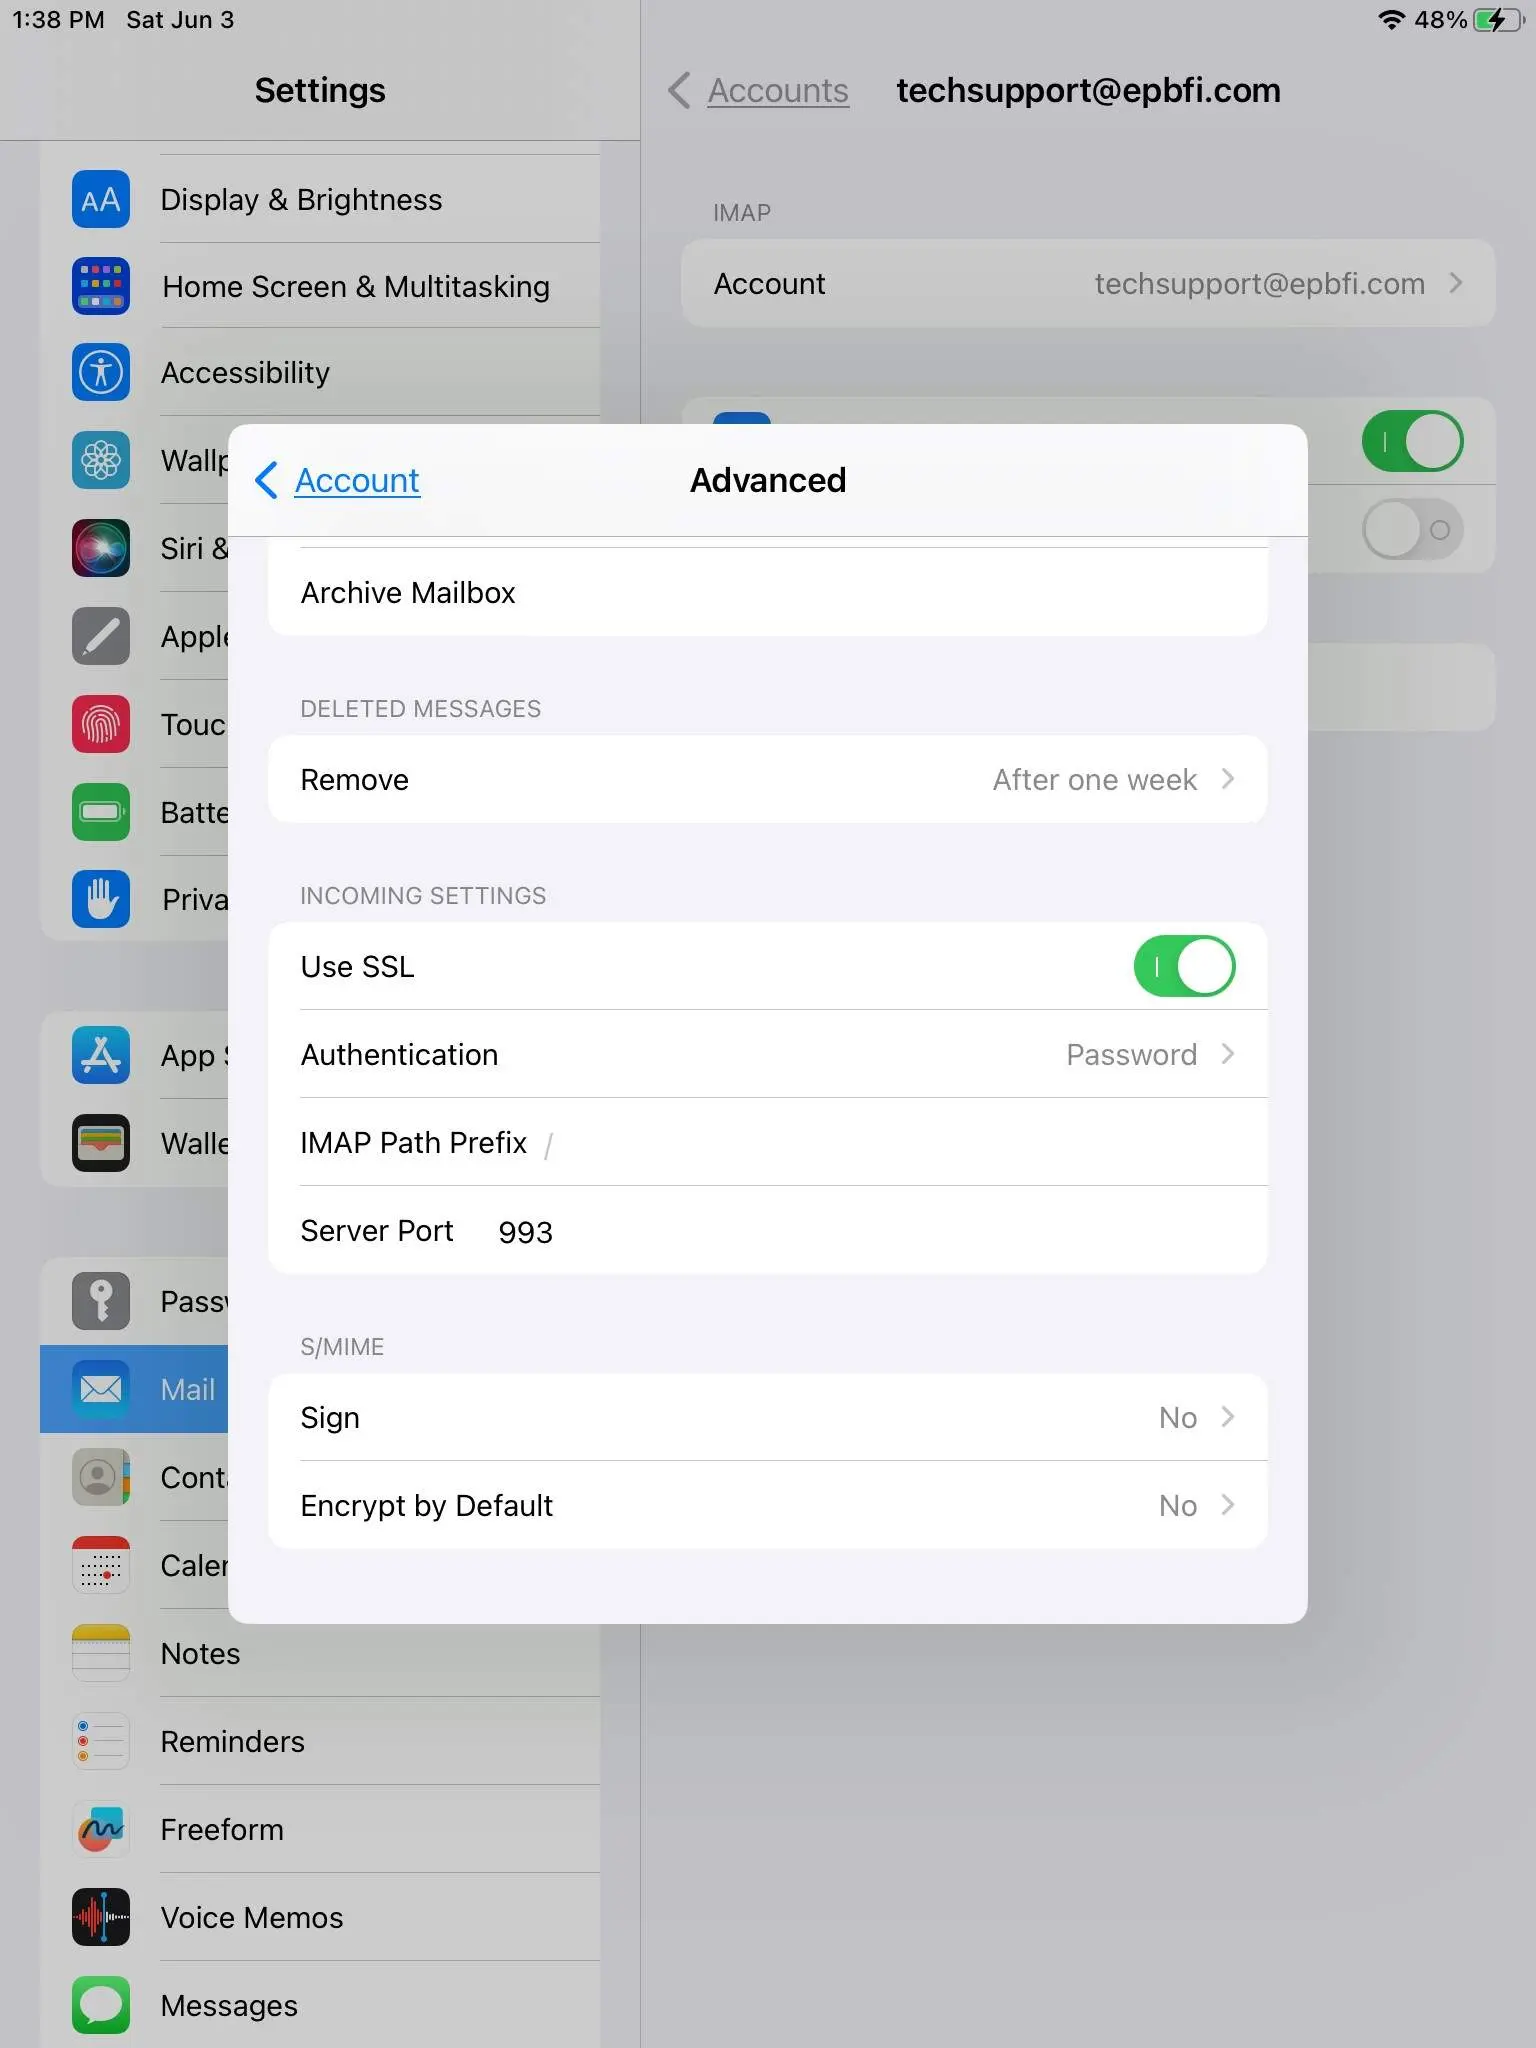
Scroll down and click on advanced at the end.
Set advanced incoming settings
- Scroll to the end.
- Make sure Use SSL is turned on (green and switch is to the right)
- Make sure Authentication is set to Password.
- Imap Path Prefix is empty (or grey /)
- Enter the port number.
- Click Account on the top left with the blue arrow.
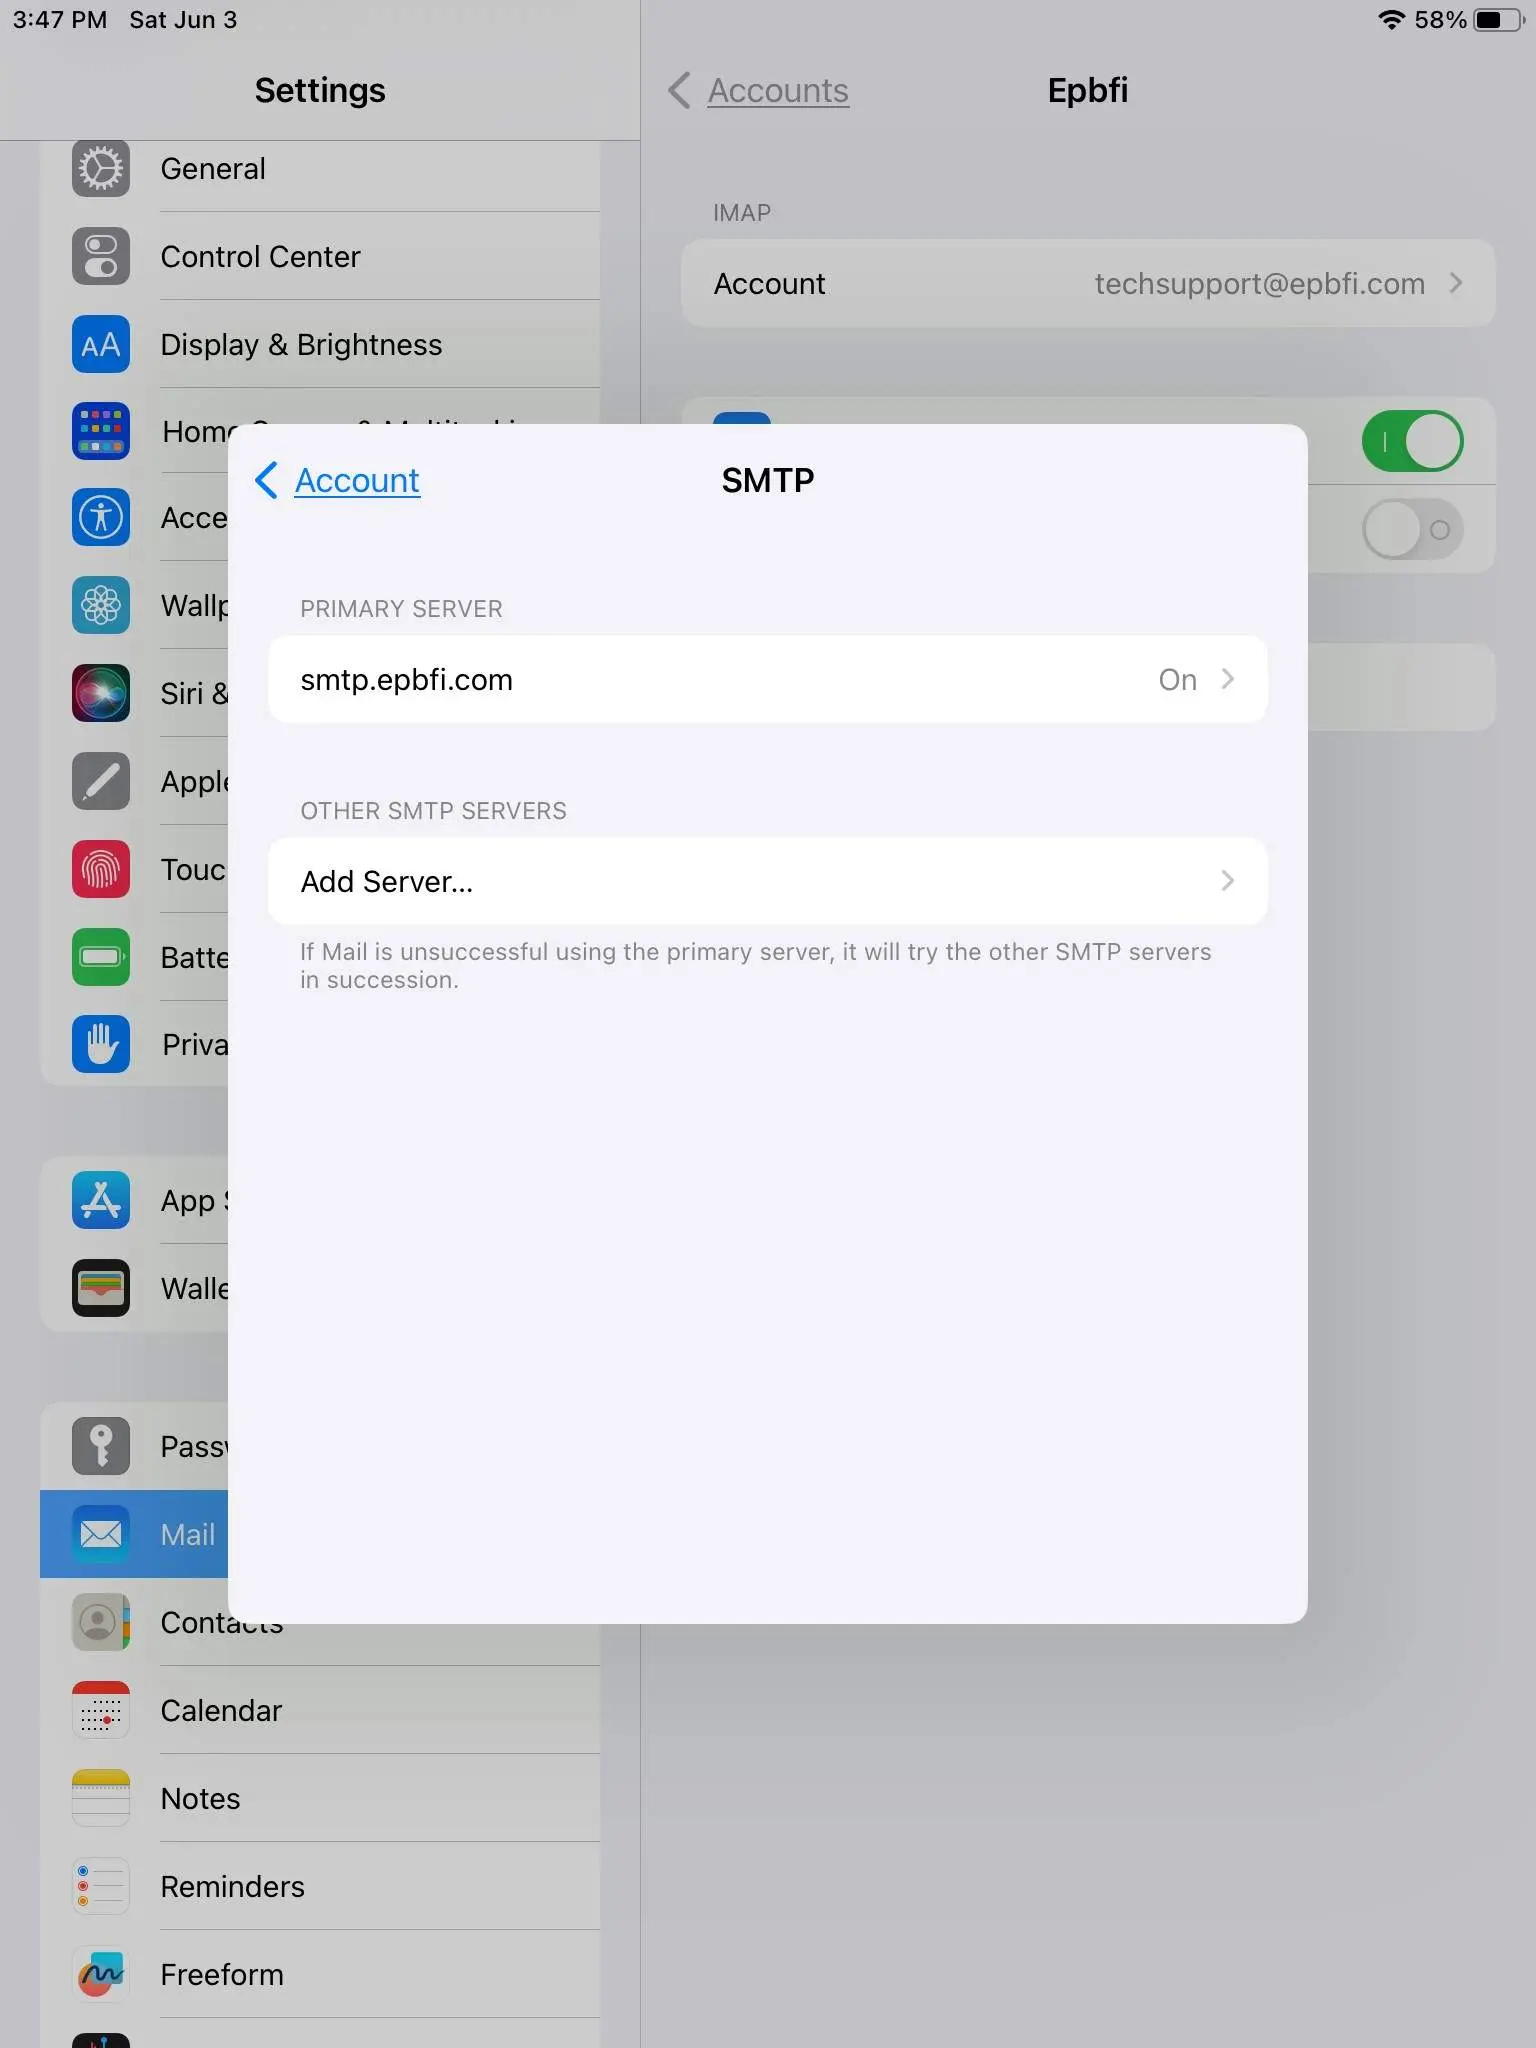
Scroll down and click on SMTP.

Click on the primary SMTP server.
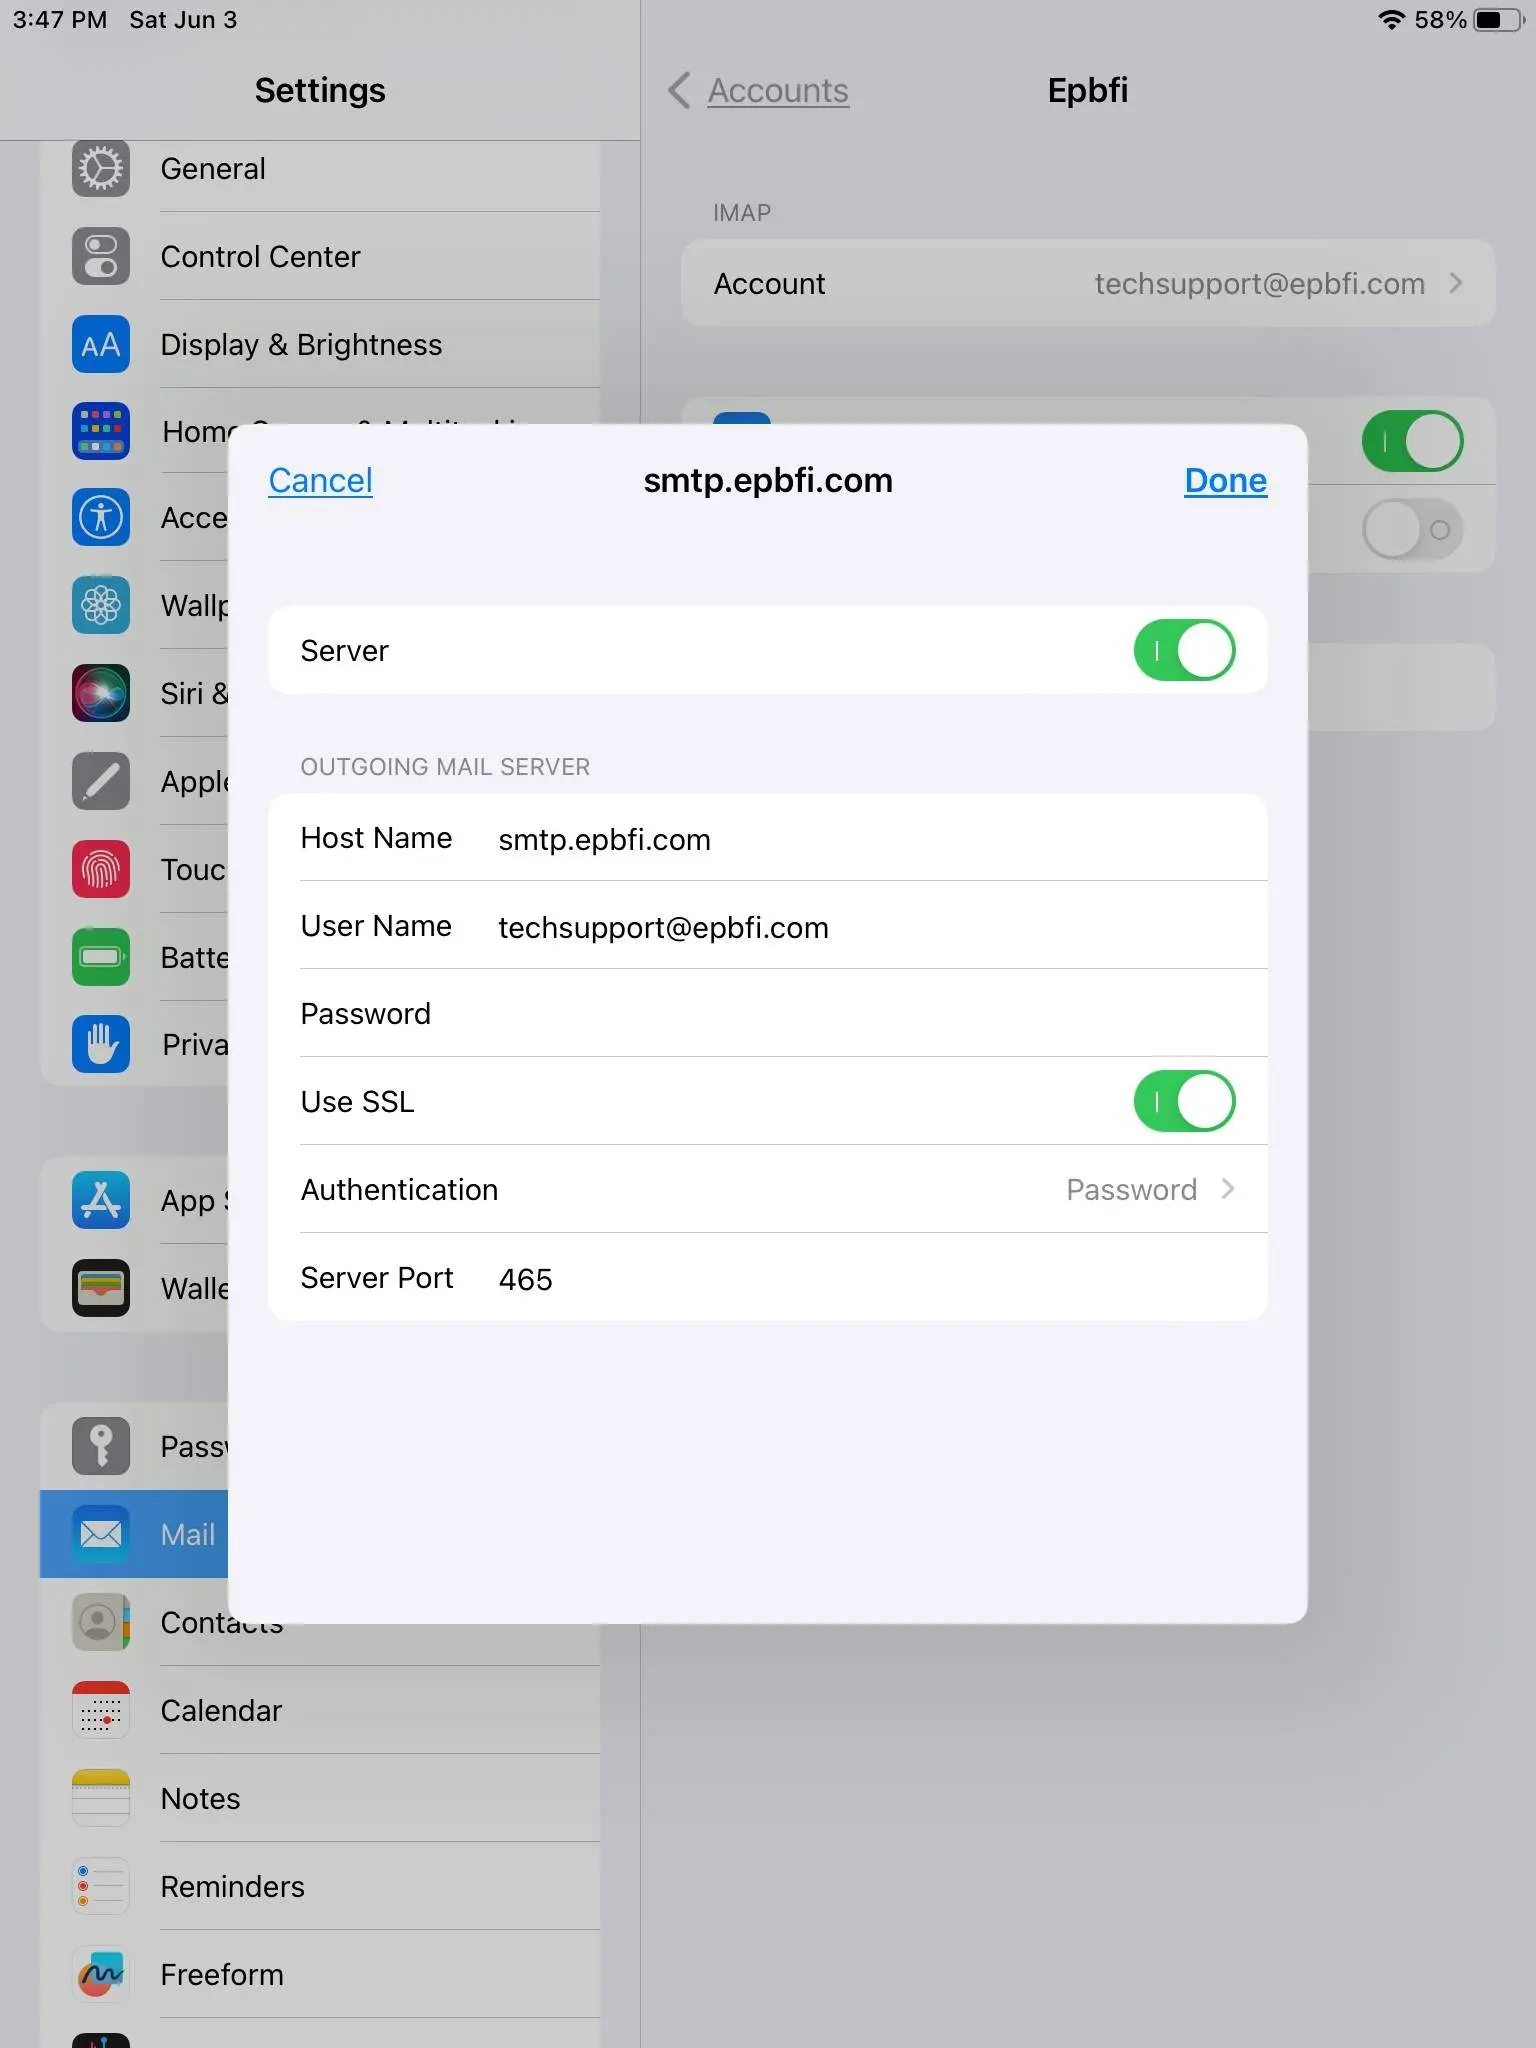
Set advanced outgoing settings
- Make sure Use SSL is turned on (green and switch is to the right)
- Make sure Authentication is set to Password.
- Enter the port number.
- Required Enter the username.
- Required Enter the password.
- Click Done at the top right.
Update Password
Startup
The program starts up looking like this.
You don't need to be here though. None of the settings are changed here.
Go to Iphone/Ipad Settings, then Mail, then Accounts.
- From the Iphone/Ipad home screen go to the system settings.
- Click on Mail. (on an ipad this on the left, on an iphone you will scroll down)
- Click Accounts.
Click on the EPB Account.
Scroll down and click on Advanced.
Set advanced incoming settings
- Scroll to the end.
- Make sure Use SSL is turned on (green and switch is to the right)
- Make sure Authentication is set to Password.
- Imap Path Prefix is empty (or grey /)
- Enter the port number.
- Click Account on the top left with the blue arrow.
Scroll down and click on SMTP.
Click on the primary SMTP server.
Set advanced outgoing settings
- Make sure Use SSL is turned on (green and switch is to the right)
- Make sure Authentication is set to Password.
- Enter the port number.
- Required Enter the username.
- Required Enter the password.
- Click Done at the top right.